Today I am bringing you a fabulous DIY. Well, actually it’s not me who’s bringing it so to speak, but it is completely fabulous. A friend of mine made me these incredible DIY building blocks and today she is bringing us all the tutorial.
This means in no time at all we will all be elbow deep in these fabulous, life size, lincoln log type, blocks!
Please welcome Megan, who blogs over at HEN Family, to our space today. Here is Megan’s DIY Building block tutorial:
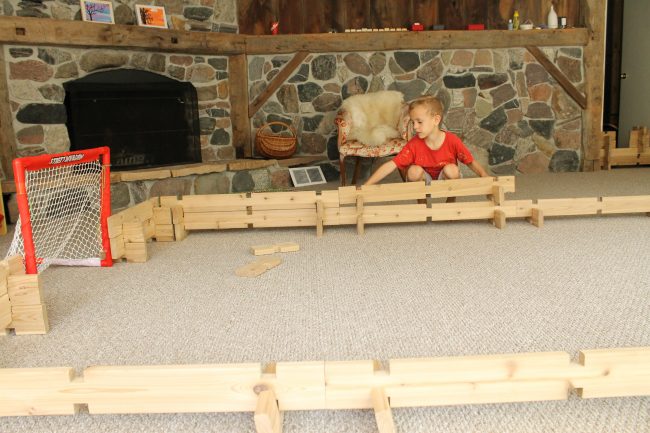
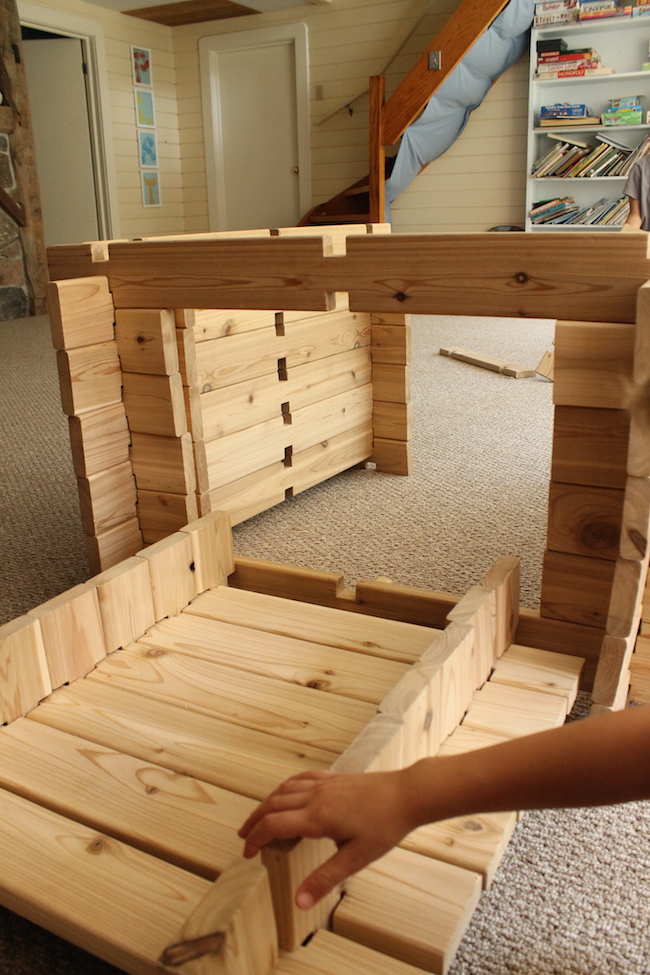
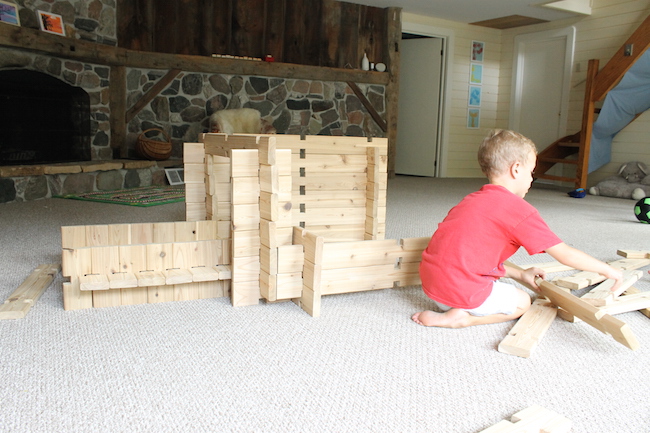
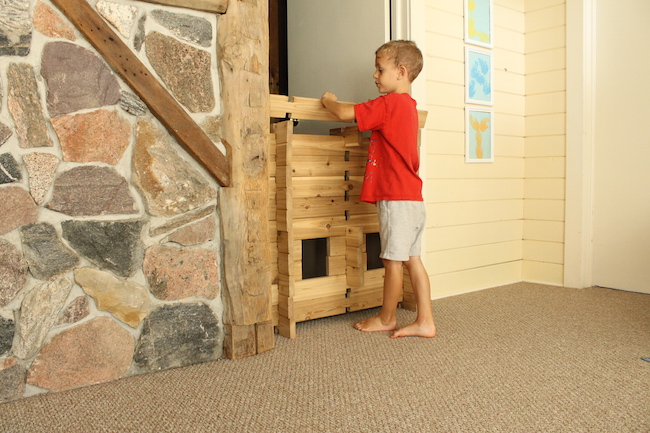
Some toys keep kids occupied for only a minute or two before they get bored and look for something else to move onto. Toys that provide opportunities for free play tend to be the best ones for kids and the ones we prefer to keep in our home. These DIY wooden building blocks have been providing so much imaginative play and endless opportunities for free play.
From building a ship to creating a hockey arena to setting up the most amazing natural playscape ever, these building blocks are by far one of the best toys. They’re also perfect for kids of all ages, since they can be used for so many things and their purpose is whatever the imagination wants them to be.

DIY Wooden Building Blocks
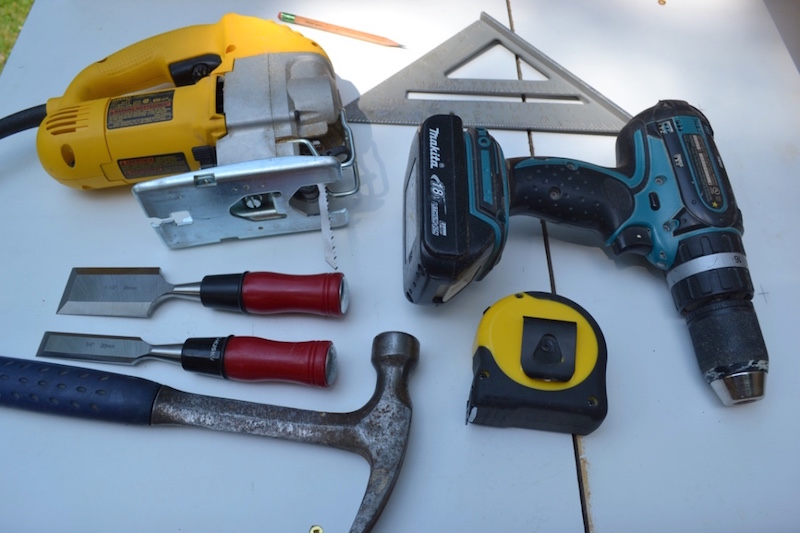
All you need to make these diy building blocks are some simple materials and a few tools. If you don’t have all of the tools lying around, check with a neighbour or even look into borrowing one from your local hardware store.
Tools Required
- Wood
- nine (9) – 10′ 2×4 pieces
- two (2) – 8′ 2×8 pieces
- Cordless Drill
- Handsaw
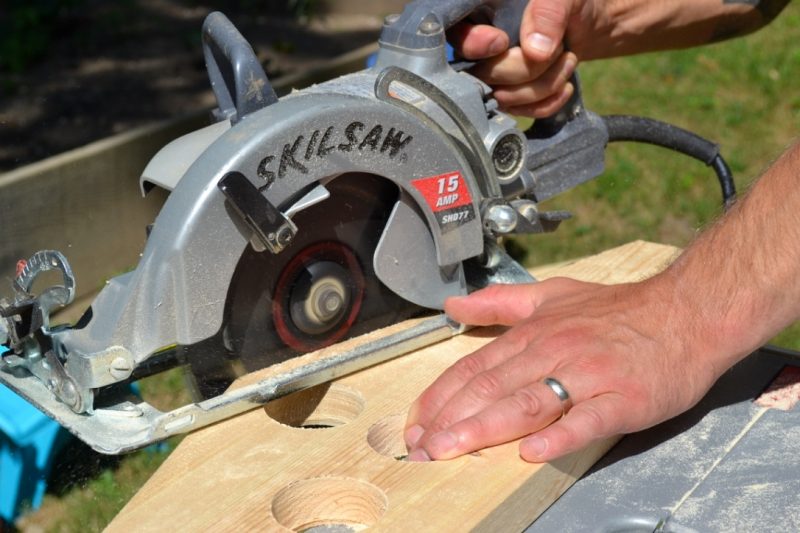
- Jigsaw (for arcs)
- Measuring Tape
- Hammer
- Chisels (optional)
- Framing Square
- Pencil
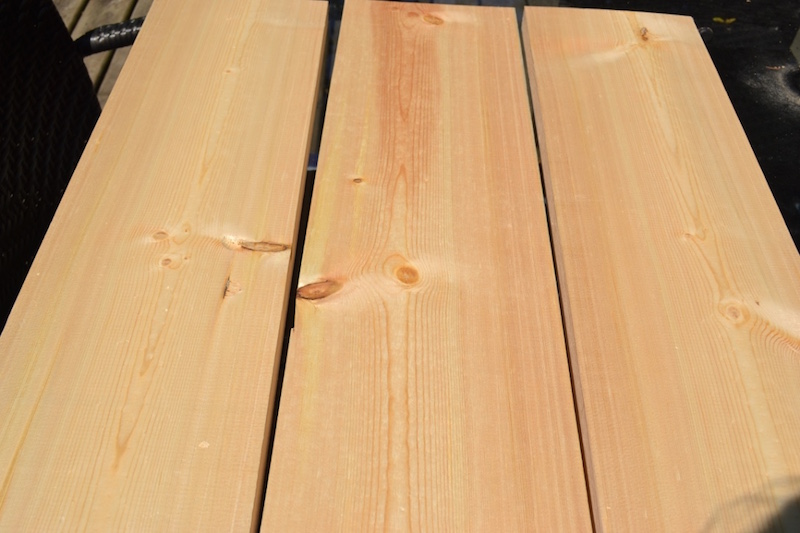
*you can use any type of wood you prefer, but we used cedar and pine. You also won’t need as much wood if you want to just make fewer blocks.
Instructions
- Start by cutting your pieces:
- Take six of the 10′ 2×4’s and mark them out to cut. You will be cutting them into two 3 foot pieces and two 2 foot pieces. Cut these pieces.
- Take the remainder of the 2×4’s and cut them into 8″ pieces – cut as many 8″ pieces as you can get out of the wood.
- Take the two 8′ pieces and mark them out. Cut them all into 2′ foot pieces. You should have 8 pieces in total when you’re done cutting.

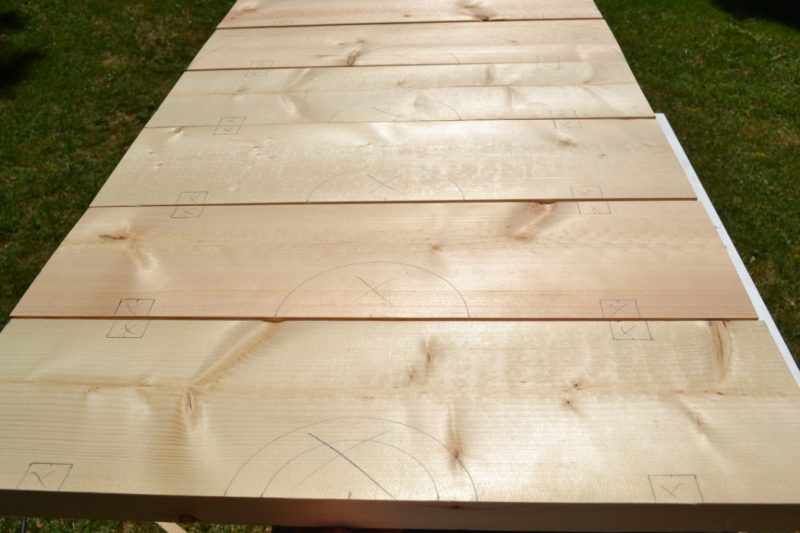
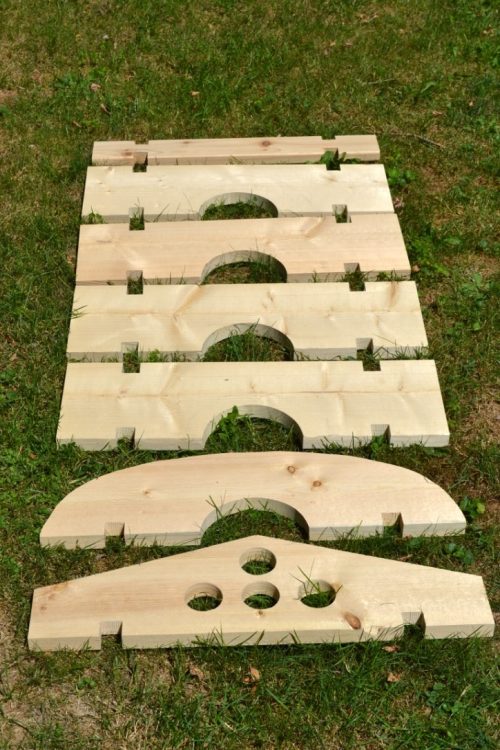
- Mark your notches and arcs. All of the two foot lengths will have four notches aside from two of the 2×8 pieces. Everything else is as follows:
- On two of the 2×8 pieces, mark only two notches and for 1/4 of the 8″ pieces, mark only one notch.
- The remainder of the 8″ pieces will have two notches on each piece.
- The three foot pieces will have six notches on each piece.
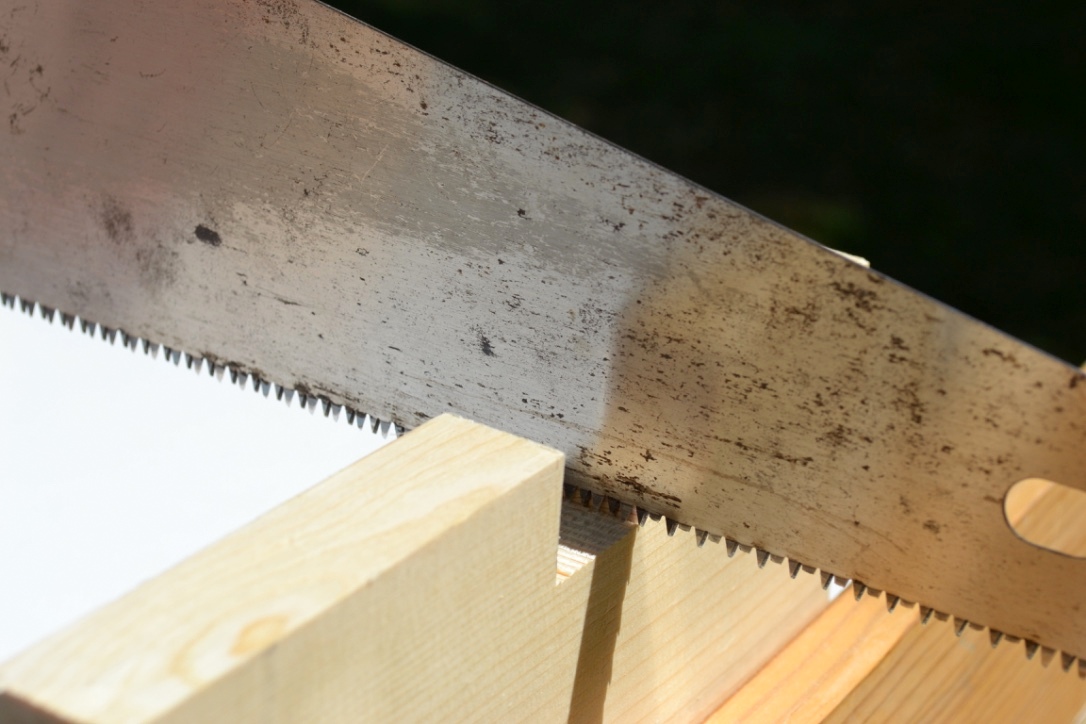
- Mark each notch 3 1/2″ in from each end of the 2 foot and 3 foot 2x4s and the 2 foot 2x8s.
- Each notch will be 1 5/8″ wide by 3/4″ deep. You will be making notches on both the bottom and top of the piece.
- For the arcs: for five of the 2×8 pieces, mark an arc right in the centre of the pieces. The arc will be 8″ from point to point and 3 1/2″ tall. (This arc that will be cut out will be the template for the 8″ pieces with one notch.)
- For the 2 foot 2×8 pieces, feel free to cut them how you see fit as they will be decorative pieces. We cut an arc out of the bottom and top of make to a rainbow shape, for example. Another was cut with a point similar to the top of a circus tent. Here are the instructions for those pieces: For one of the two 2×8 pieces with two notches, mark an arc from one end of the piece to the other end of the piece. For the other 2×8 piece with two notches, mark up 3 1/2 from the bottom of the piece on each end and draw a point right to the centre on the top. Cut out the pieces. The arcs will need to be cut with a jigsaw. See picture below.

- At this point, you can take the chisels to clean up the notches if you need to, making them completely even and smoothing them out. This part isn’t necessary but doing so makes them a bit cleaner looking and cuts down on sanding time. It must be done before sanding, however.
- After all the notches and decorative touches have been cut and chiseled, it’s time to sand.
- To sand, start with an 80 grit sandpaper, then move up to a higher grit such as a 200 great to smooth them off as best as possible. You’ll want to make sure they’re quite smooth so you don’t need to worry about slivers. You can use a drywall sanding sponge (80 grit) to sand the notches – this technique worked best for us.
- After everything is sanded and smooth, do your best to get all the dust off.
- After that, they are ready to play with! * These DIY wood building blocks can be enjoyed for years to come. Time to let the imaginations run wild!*NOTE: If you want to protect the DIY building blocks against minor moisture or even just sticker hands, feel free to apply a natural protectant such as a beeswax made for furniture. Make sure to follow the directions on the container, but most are applied with a soft, lint-free cloth.

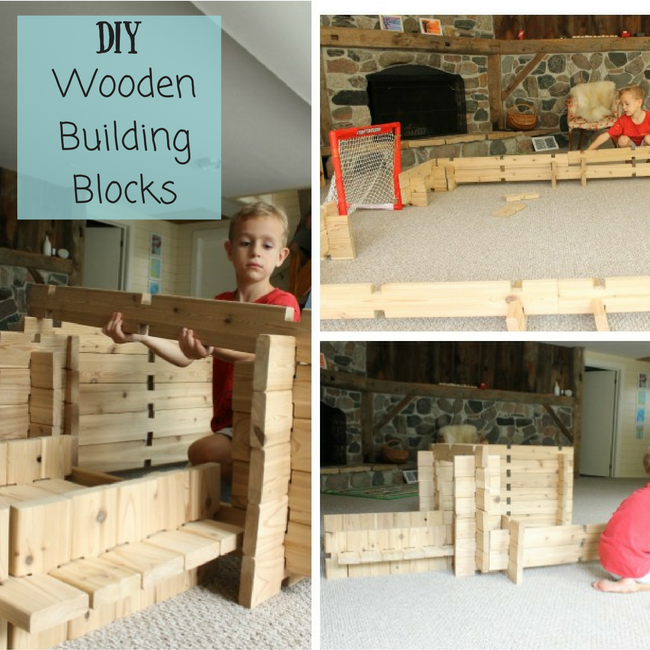
There you have it! DIY wooden building blocks perfect for hours (and hours and hours) of childhood play and imagination.
Thank you so much Megan for sharing your DIY with us. I know lots of little ones who will be loving these blocks! You can visit Megan on her blog HEN Family for tips on healthy and eco-friendly family living. You can also follow her on Facebook and Pinterest.
Thank you very much for reading friends, I hope you have a lovely Monday!

The blocks look amazing! Thanks for sharing.
They really are Angel – thank you!
How do you make the notches perfectly square? Do you use a really small jigsaw blade so that you can turn tightly?
Yes Jennifer, and then lots of sanding!
Greetings!
Super project! Thank you for the clear directions.
That make a lot of pieces to play with – do the photos show one set of wood from your instructions? Just trying to visualize whether to make one of two sets. Easier to do all at once then to go back!
Thanks!
Hi Heidi,
So glad you like this project. We made one set of the blocks, and it is a really great amount. Lots for making a fort, grocery store, ice rink, you name it!
Looking forward to making these for my daughter. Do you have a good way to store these? How do you transport them to play areas?
Thank you for this great idea,
Stephanie
HI Stephanie – so glad you like the idea! The blocks are wonderful. We stack them on the bottom two shelves of a big bookcase we have in our playroom. Maybe that idea would work for you too?
That looks so fun. How would 1x4s amd 1x6s work?
Hmmm Interesting question. I’m not sure! I would think it would work well and would be a lighter option for smaller children, though I’m not sure as I have never tried. If you do try, please let us know. Thank you!
You should sell these on Etsy! For parents who aren’t very handy 😬
HI Liz! This is a fun suggestion! The trouble is with shipping costs associated, unfortunately! But you could always higher a local handyperson perhaps?!