From beaches with wild horses to riverside cliffs with flowering blackberry bushes, we’ve been steeped in sunshine while camping at our local state parks. When camping, I try to limit planned activities and pack minimally so that we can enjoy the simple pleasures. What I love about sand art for kids is that it is easy and fast to set up.
Sand Art for Kids
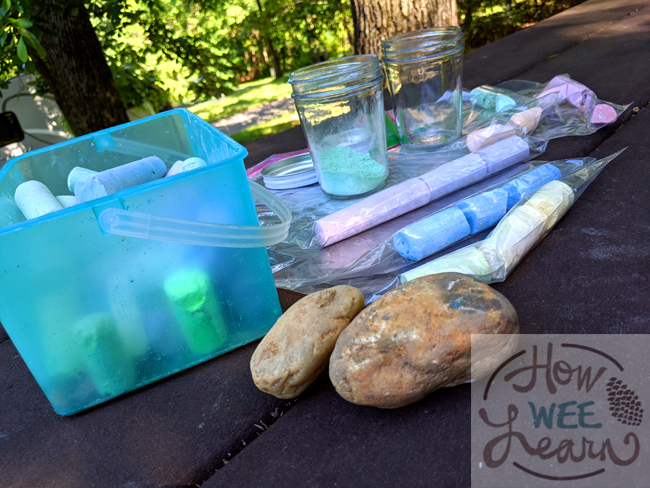
Materials:
- Sidewalk Chalk
- Glass or plastic Jar with lid
- Plastic Bags
- Fist-Sized Rocks or a small hammer
Goal:
By using gross and fine motor skills, your child will enjoy the process of creating sand art with sidewalk chalk. There is creative freedom to explore patterns. Through repetition, your child will create a decorative and fun summer sand art piece.
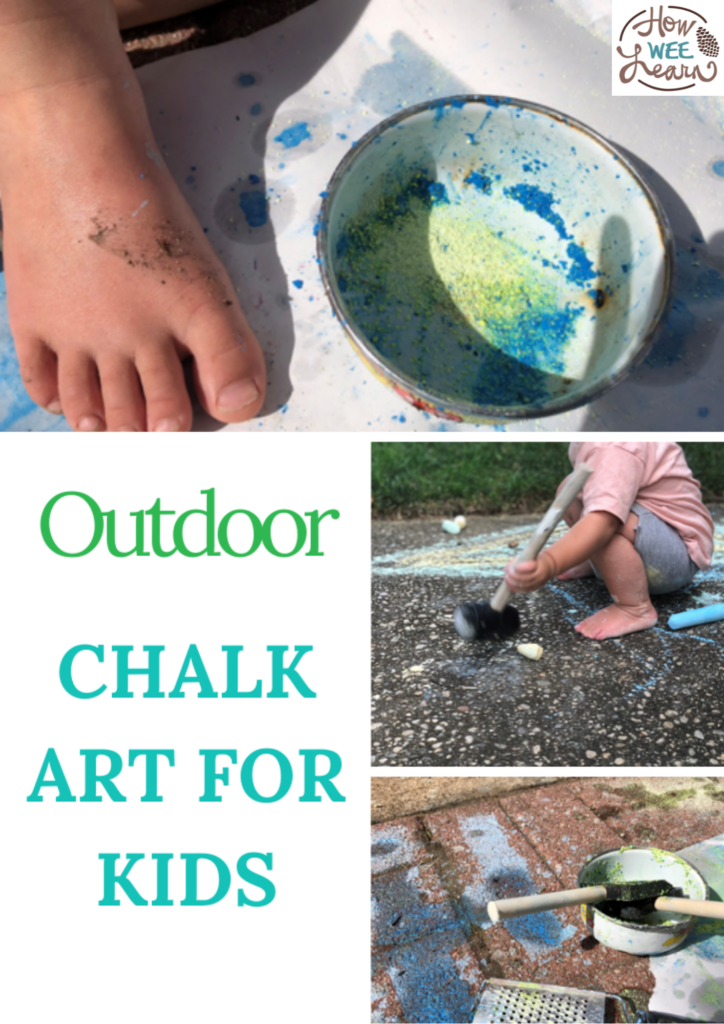
Step 1: Bag and crush sidewalk chalk into sand
Collect broken and used sidewalk chalk, then separate the chalk by color. Place each color in it’s own bag. Using a fist-sized rock, help your child pound the bagged chalk until it has a sand-like consistency. Be prepared for squeals or giggles as your child enjoys their freedom to hit and destroy something with a rock.
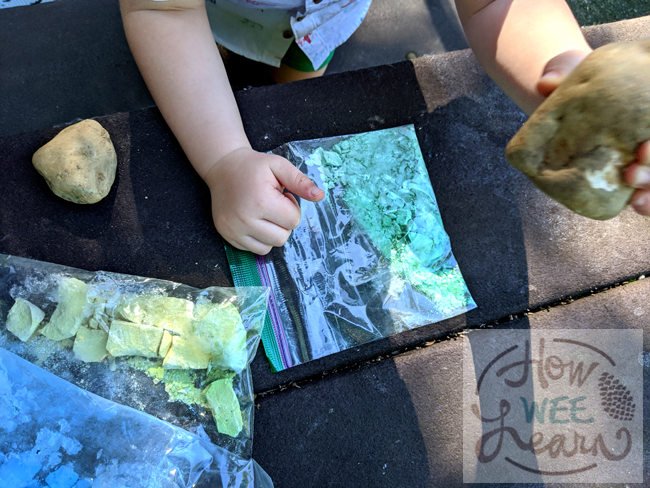
Safety tip: Help your child avoid crushed fingers by paying attention to where their fingers are placed on the rock, and where their other hand is in relation to where they will be striking the chalk.
When we broke the chalk down into powder, some of the bags did get small holes. Try to work outside on this project so that any spilled chalk can wash away with the next rain. If you have a non-porous mortar and pestle, you can achieve the same sandy result without using plastic bags.
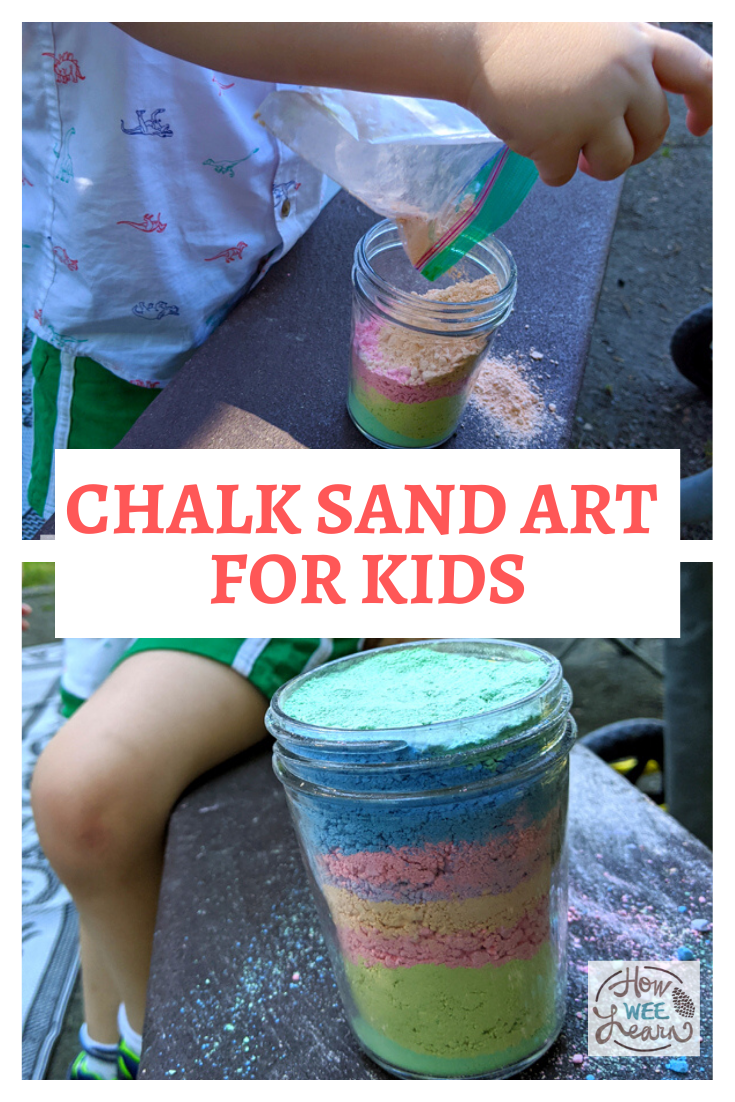
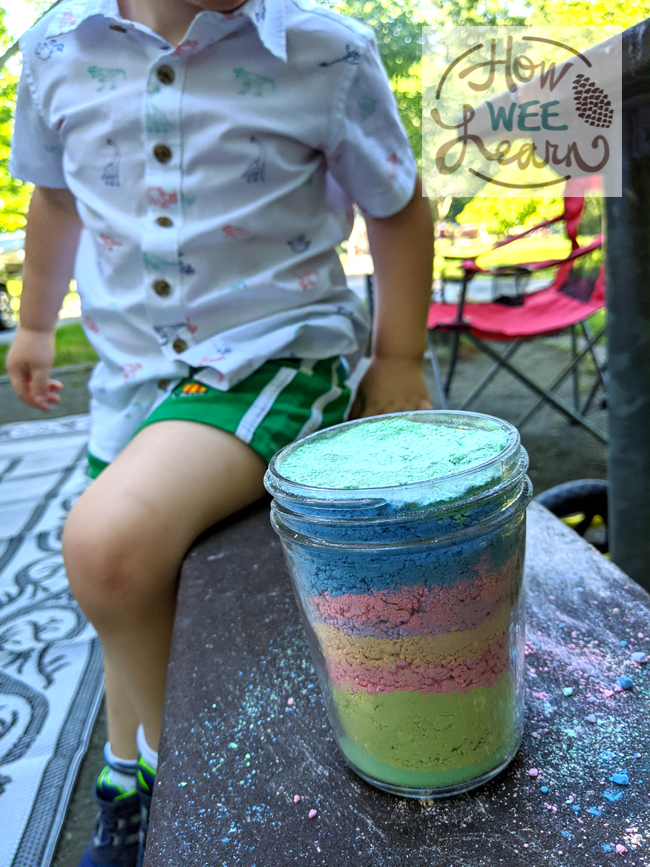
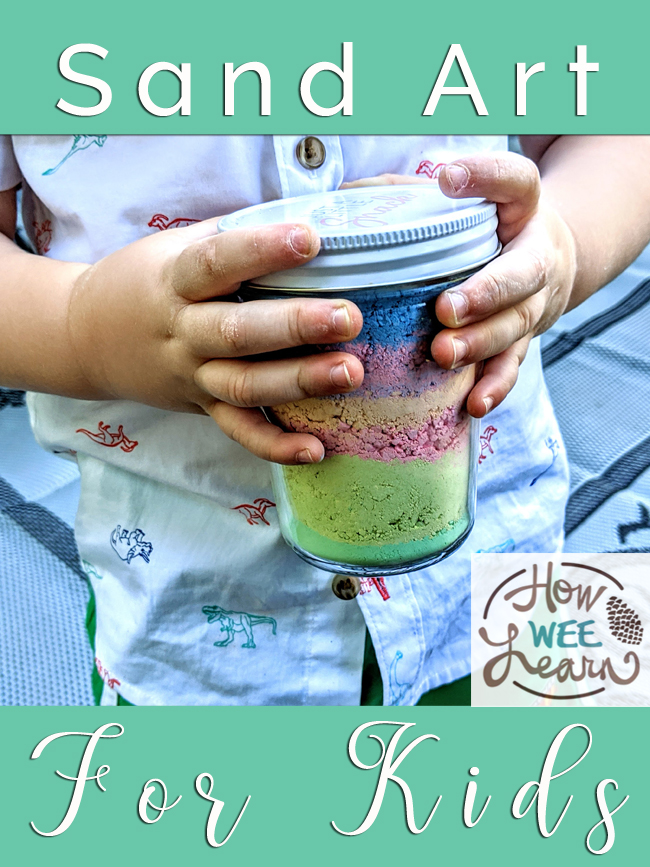
Step 2: Pour the sand into jars
Have your child select each color and pour some or all of the chalk into the jar. By pouring the chalk themselves, they are using large and fine motor coordination. You may need to demonstrate how to pour and give a helping hand for younger kids. Resist the temptation to do all of the pouring for them, so they can learn themselves.
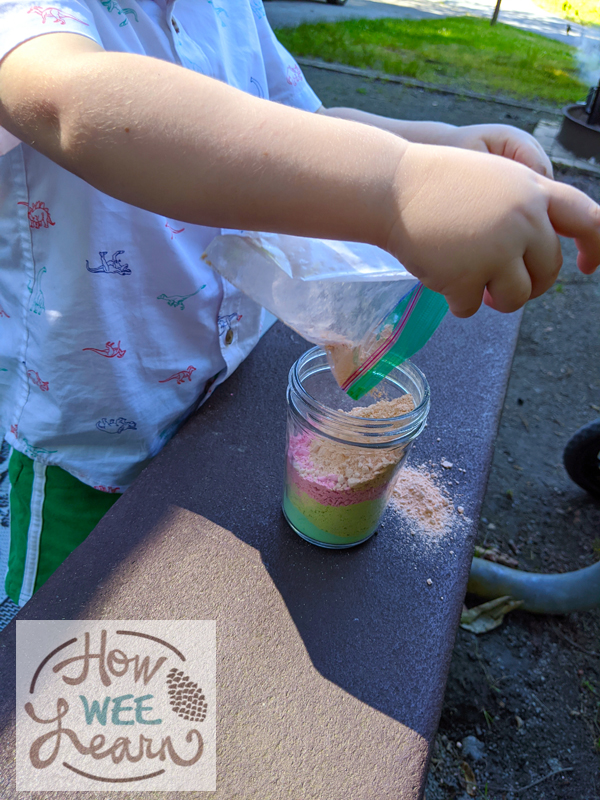

Encourage your kid to play with proportions of the chalk, creating large and small stripes of colored sand for their sand art project. You can even do two jars, the first for experimentation and the second being the final work of art. My preschooler wanted to dig around with his fingers in the chalk. He also likes to pour the sand out and re-pour it in, and to shake the jar. The experimentation is just as, if not more, important than the final result, and so much fun. Creative minds are curious minds.
By creating sand art for kids, your child will love having a project they can get a little messy with while making a cool summer-inspired artwork they can be proud to take home. Sand art may be a nostalgic project for you, but with a quick set up, it is also the perfect activity for kids while waiting for hotdogs and foil packs to cook over the campfire. Have fun creating beautiful sand art!
Based in Maryland, Amy is a nature-enthusiast who loves hiking, reading, and creating. With a MFA in painting and university teaching experience, she loves combining visual art and nature to create crafty and play-based learning experiences for her preschool-aged son. Extra crafts and fine art can be found on Facebook and Instagram @amyfixart or at www.amyfixart.com
You might also like:

Thanks for this! I still have some art work my son made me when he was little. Now I have grandbabies and we will love making this together!
Oh wonderful Amy! Memories to keep and memories to make! xo