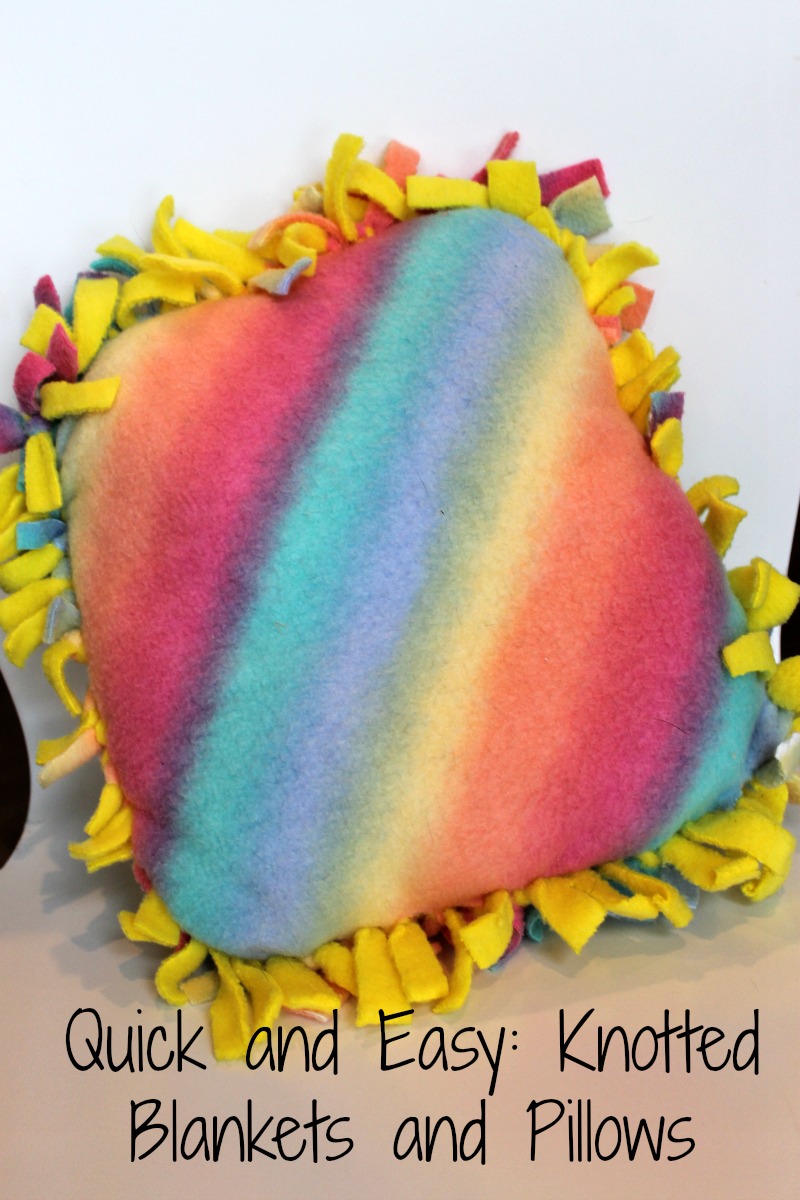
During the winter a lot of crafting happens around here. One craft that keeps reappearing time and time again are these knotted blankets and pillows. I think they are so loved because of their simplicity. They are so very easy to make, require NO sewing and we almost always have everything needed on hand.
One year, with my grade 5/6 class I made these knot pillows as a fundraiser. We raised A TON of money. We sold them to the students in our school and within the first day we had to stop taking orders as we had sold more than 300 pillows!!! Just something to consider all you fundraising people out there 🙂
Both knotted blankets and knot pillows start out the same way. And they are both equally simple. Knotted blankets do take longer to make, whereas a pillow I can whip up in a matter of minutes – and I have, HUNDREDS of times 🙂
How to Make Knotted Blankets:
1. Cut squares of fleece or felt. Felt is lovely and my personal favourite, but fleece is easier to work with as it has some stretch. You can cut them as big as you would like them, and as many as you would like your blanket big. 6 or 8 inch squares work well.
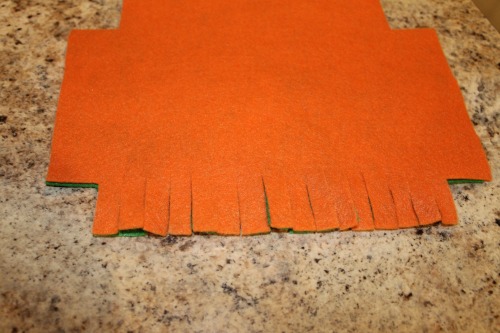
2. Cut the corners out of all of your squares (the pictures are rectangles, not squares, but the same idea).

3. Cut 1 inch long strips along all sides of the square. Make sure you cut the same number of strips into each side. I find it easiest to cut each side in half, and then each half into half (so now you have quarters) and then cut each quarter into half again (so you have eighths) continuing until I have thin strips. I usually do 2 squares at a time to save a bit of time.
4. Do this for all of your squares, keeping the same number along all sides of all squares 🙂

5. Next, you simply knot all of your squares together. Start with two squares and knot one side of each together – This is what it will look like as you begin to knot

6. Continue knotting until all of the squares are together! I find it easiest for kids to knot the blanket into rows first, and then knot the rows together.
How to Make Knot Pillows:
1. Cut two rectangles or squares (depending on the shape you would like your pillow) out of fleece or felt

2. Put the two pieces on top of each other (bad sides of the fabric (if there are) facing each other) and cut both pieces at the same time. Much simpler
3. While the two rectangles are on top of each other, cut the corners out.
4. Still keeping them stacked, cut one-inch long strips along each side of the rectangle (the picture shows the first side cut, continue for the three others)
5. Knot the sides together. Take one strip from the top fleece and the strip directly below it from the bottom fleece and knot. Continue doing so until 3 sides are knotted.
6. Stuff your pillow. Poly fill is relatively inexpensive and one package does a lot of pillows.
7. Knot your last side together.
These knotted blankets and pillows are excellent crafts for kids to do. They are simple, great for developing fine motor skills, math skills, and a wonderful sensory activity too!
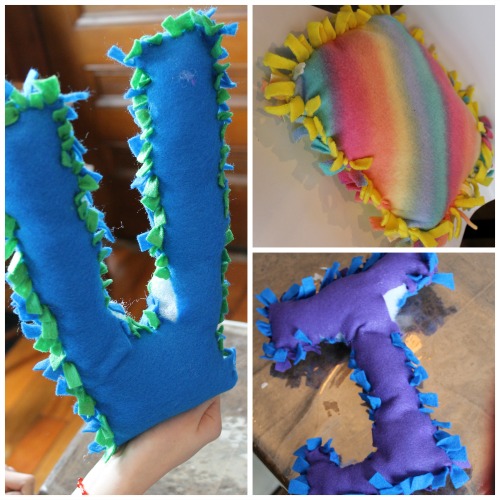
My daughter and her friends tried to make pillows in the shape of letters. This was VERY tricky and excellent for challenging brains! It really requires some planning and designing … a very fun way to work on visual spatial skills!
Sam, at the age of 3, practiced tying with this activity. I made him 2 squares with very few and very long slits cut along the side and helped him throughout. He was very determined and got all of those knots tied with just a bit of help. Definitely not an independent activity for preschoolers, but doable with some modifications and assistance.
These pillows and blankets are fun to make and make great gifts! They hold up very well – some we have had for years and they are still together and going strong! A great activity as a fundraiser, a wintry afternoon at home, or at a sleepover!
Please consider liking us on Facebook so we can share more creative learning activities with you and your wee ones! Thank you!

Leave a Reply