I was given some lovely magazines lately – and I have really been enjoying them. But, like anything that stays in my hands too long, one of those magazines has been sacrificed to our crafting.
This time as a birch winter tree art project!

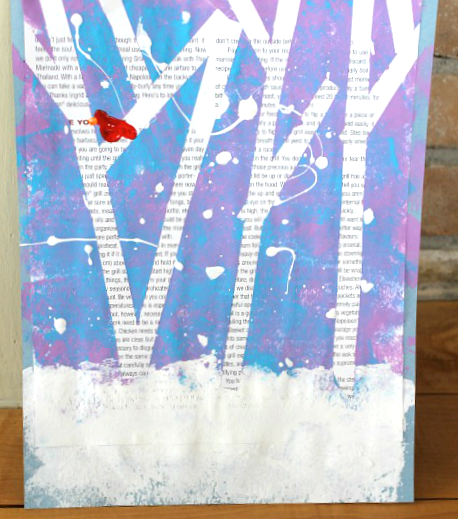
I must say, this winter art project turned out even better than I had imagined it would. It looks great! And we learned quite a bit along the way, as our first attempt was a major fail. And so was our second.
Two things we learned while creating this birch winter tree art project:
1. Electrical tape does NOT come off of paper the same way that painters tape does … please do not use electrical tape
2. Some lovely new magazines use recycled ‘greener’ pages … these do not mix well with painters tape. For this winter art project you need the glossy magazine paper.
And finally, on our third (and final … this was it – now or never) attempt, we succeeded!
Please note that these pictures are a mixture of all three attempts — you may see electrical tape (DO NOT USE IT!), you may see recycled, dull magazine paper (DO NOT USE IT!) …. you see I try to balance taking pictures of our activities with actually enjoying them with my little ones. So by our third attempt I was needed heavier on the, “It will work this time, we can do it!” side of the camera.
And now, with by far the most warnings and precautions I have ever given prior to introducing a SIMPLE art project, I bring you that simple winter art project!

For this birch tree craft we used:
Painters tape (eventually)
A page from a glossy magazine with lots of text (eventually)
Blue, purple, and white acrylic paint
A sock (or sponge) and a paint brush
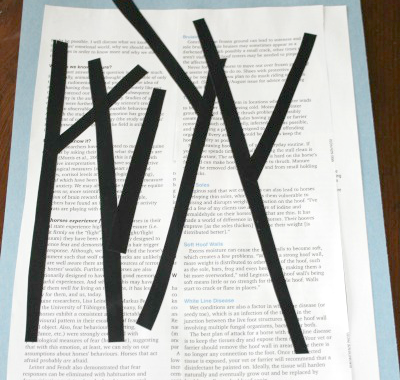
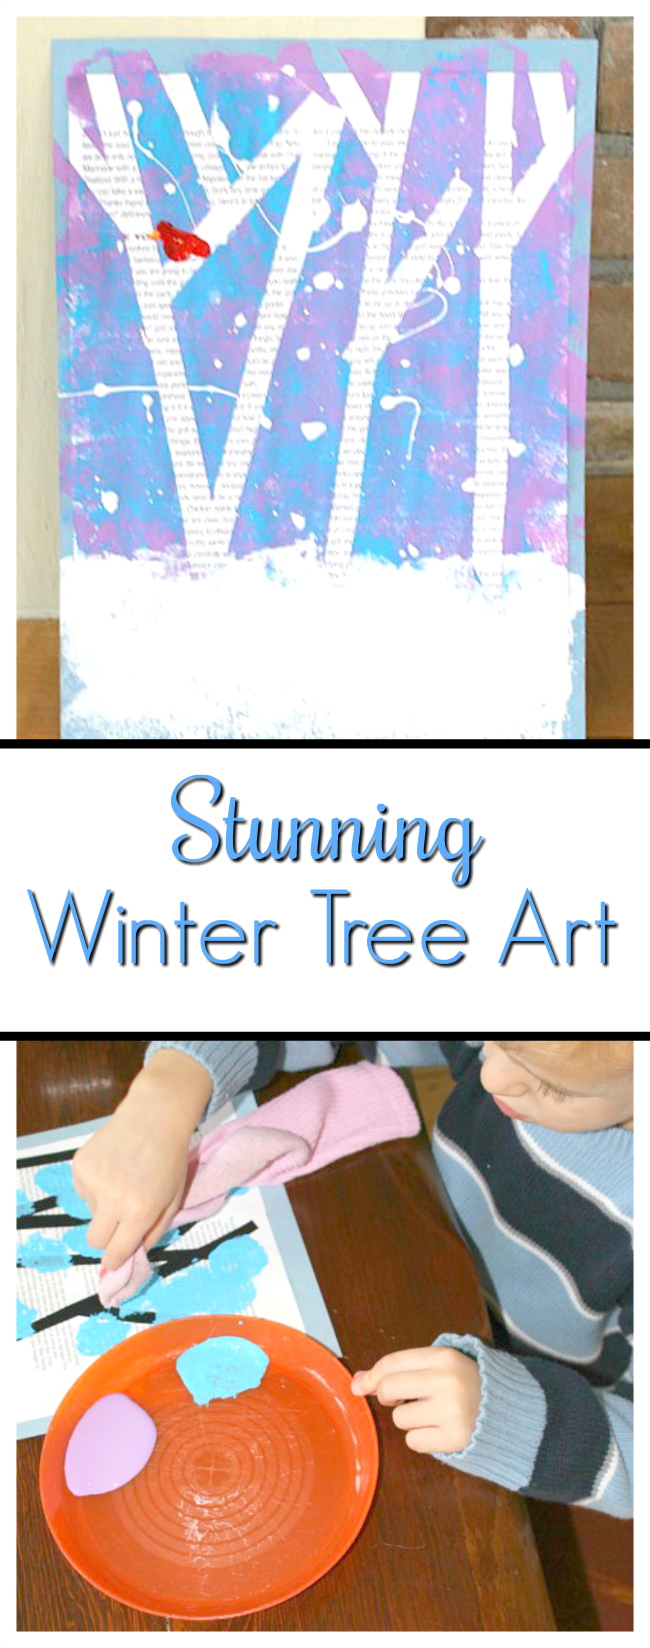
To begin, we glued the magazine page to a piece of construction paper.
Next, we cut skinny strips of the painters tape and arranged them in ‘birch tree like’ configurations on the page.
Then it was time for painting. We didn’t have a sponge on hand, so opted to use a sock. I actually really liked using a sock with my 4 year old for this art project – he could hold it well, and it gave a great texture.
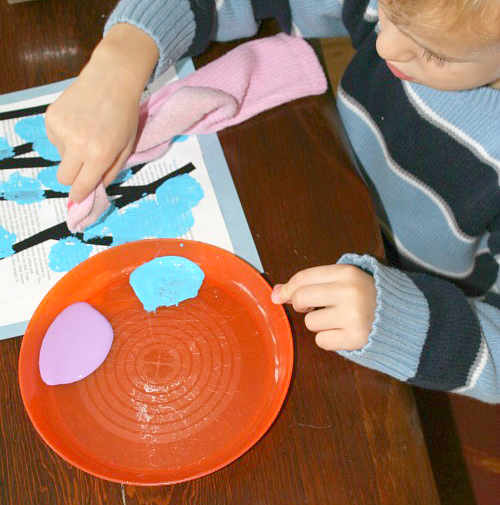
They dotted some blue and some purple all over the page until it was completely covered (except for the area under the trees where the snow as going to be)
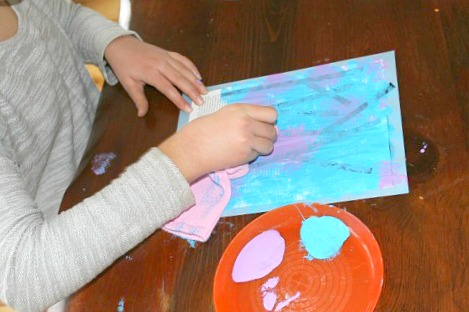
After, they sponged on some white paint at the bottom. My 12 year old daughter stated that it really needed some snow …. some splatter painted snow none-the-less. I cringed, but agreed.
Once the paintings had dried for 20 minutes or so, we carefully peeled off the tape.
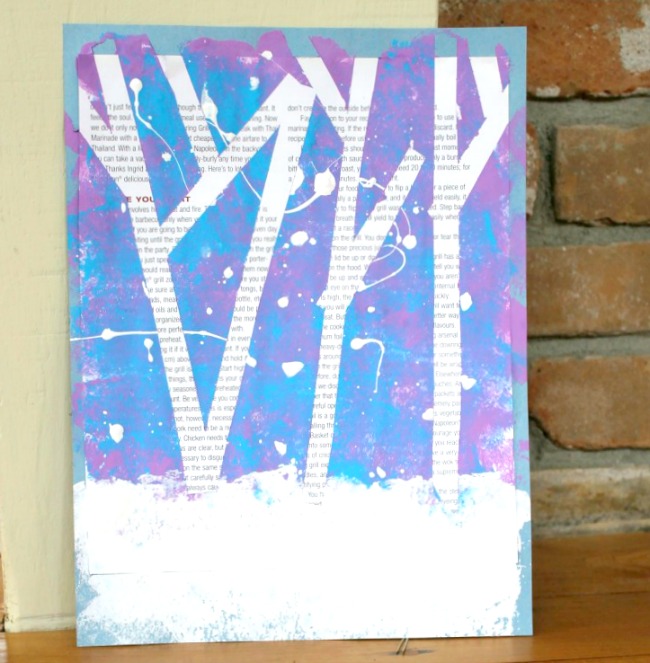
Madeline decided hers needed a little cardinal … it did add a lovely touch!
This winter art project took some trial and error. But that in itself was a good learning experience for my little ones – to persevere with a positive attitude (well, relatively positive, I am human).
And we were rewarded with success, and a lovely winter tree painting to display as well. And a story of Mama crumpling up the second attempt… with a positive attitude though.
Please consider following us on Facebook so we can share more creative ideas with you! Or join over 300 000 other readers on the How Wee Learn Pinterest Boards! Thank you!
Thank you for reading friends! I hope you are having a wonderful week.


A beautiful, wintery scene. I’m a grandma, who still enjoys crafting, so I’m going to try this.
Oh this is a fun one Marilyn! And there is certainly no age limit for crafting (I hope!) I hope you enjoy it,
Love this! Have scheduled it for my blogs FB page too 🙂 Thanks for sharing with Tuesday Tutorials #pintorials
Thank you very much for sharing Kate! And for hosting as well!
Love this idea! Am doing it today with my daycare group! Had a really hard time finding magazines with a page that didn’t have pictures and wasn’t an ad for medications on it!
Yay! Have fun!
Did you also use acrylic paint for the dots of white snow on the blue and purple?
Sure did!
Has anyone tried tempera paint? Also, I’m assuming painters tape would stick to newspaper. Any experience on this?
Hmm … good questions – I’m afraid not me, but hopefully someone can help Lori
It is a great project Thank you for the do not tips
Why reinvent the wheel, right Cathy?! So happy you like the idea. Thank you for taking the time to let me know.
Thanks a lot for uour sharing.I get another connection from Canada today!
Tahnks a lot for your very new idea.
Tried this today and had a great time with a beautiful piece of art that I actually really like (not that I don’t LOVE everything my child produces). 😉 😉
We added some glitter for extra girlie fun.
Thank you!!
What a fabulous idea to add glitter! Glitter makes everything better. Thank you for sharing!
May we use this project as a fundraiser for a Relay for Life parent’s night out event? 100% of the money raised would be donated to cancer research.
Of course! Have fun and what a great cause!
Hi,
How do you prevent the painter tape to stick to the paper?
Hi Roberta, I found that the painters taped peeled of nicely, as long as it was the right type of paper (be sure to check out my top tips in the post!) Hope this helps!
Brilliant! I’ve never thought of using a whole page from a magazine and masking it. I’ve always just used strips from a magazine. We will give this a go. Thanks for the top tips too!
Thanks Debbie!
I LOVE this crafting idea! So cute and the pieces your children made came out beautiful! I will have to save this one on my Pinterest boards :).
PS: I just responded to your comment on my first blog post – https://happylittletadpole.com/wooden-abc-blocks/ sorry I didn’t see it until now! Anywho, I’m not sure if you’ll see my reply there, but I was thinking that we might have an opportunity to cross promote our sites! Let me know if you’re interested!
-Another Sarah
How did she paint the cardinal?
Thank you for your question. She just added a touch of red paint with a paint brush – a little dot for the head and bigger for the body with a small stroke for the tail. An orange dot was used for the beak.