I am super excited to share this name art project with you! I cannot recall where I first saw symmetrical name art, but it’s one of those projects that has been in the back of my mind for years, waiting for the perfect opportunity to present itself.
And today, my friend, is the day!
But first, as you have come to expect, the backstory…
You may recall that I released How Wee Write this past summer. It is a learn-to-write program that perfectly complements How Wee Read, my learn-to-read program. The lessons in each program line up perfectly, so as you practice one skill in How Wee Read, that same skill is reinforced in How Wee Write.
Well, many of you lovely readers reached out to let me know how much you have enjoyed both programs.
And let me just pause right there to say, “Thank you!” Thank you for your support, for reaching out to let me know about your learning journey, for recommending my resources to your friends—for all of it—from the bottom of my heart, thank you.
Within many of those emails, I was also asked if I would be creating a learn-to-write program for cursive writing. And the answer was… YES!
And it’s done! It’s ready! It’s here!
How Wee Write in Cursive follows the same format as How Wee Write—from squiggles to sentences in 60 simple lessons—but… in cursive!
My son has been working through the program, and the other week, as I was sitting back, sipping my tea, watching him writing… BAM! I remembered. I forgot to switch the laundry from the washer to the dryer.
And then, as I made my way back to the kitchen table… BAM! I remembered about the cursive writing name art project!
And so, I immediately switched our plans for the afternoon. I told the kids to buckle up, because it was name art time.
How to Make Cursive Writing Name Art
Are you ready to make some super fun name art!? All you truly need is paper and some markers, but a few other supplies will make it a bit easier.
Here’s what we used to make our cursive writing name art:
- Paper
- Ruler
- Pencil
- Black marker or Sharpie
- Fine tip pen (optional)
- Painter’s tape (optional)
- Scissors (optional)
- Crayons, pencil crayons, markers, or paint and paintbrush
Directions
Step 1: Make Your Name Art Template
To start, draw a straight line on a piece of paper using a ruler, then write your name in cursive on that line.
You can write your name in pencil first, then trace over it with a black marker or Sharpie, or just go straight to the marker or Sharpie. If you’re using a Sharpie, be sure to put a scrap piece of paper underneath in case it bleeds through the paper.
Flip your page over. Can you see your name through the paper? If yes, carry on to Step 2! If not, hold the paper up to a window and trace over your name on the reverse side of the page as well.
For little ones, you could always do this first step for them. They will have the opportunity to trace their name (twice!) and decorate it in Steps 2 and 3.
Step 2: Trace Your Name
Take a second piece of paper and lightly draw a line down the middle of it using a ruler and pencil. This will be your line of symmetry.
Now take both pieces of paper over to the window and get to tracing!
You might find it helpful to secure the piece of paper from Step 1 with a bit of painter’s tape. Then, line up your second page so the line runs just under your name and trace over it.
Now we’re going to make the other half of your name art. To do that, flip over the piece of paper from Step 1 and secure it with a bit of painter’s tape again. Line up your second page so the bottoms of the name letters are just barely touching, and trace over your name to make the other half of your name art.
Working on a vertical surface like this is wonderful for practicing and strengthening all sorts of skills! Your child will be working on bilateral coordination, core strength, crossing the midline, hand-eye coordination… I could go on and on…
AND I WILL! Did you know writing on a vertical surface can also help improve pencil grasp? When writing on a vertical surface, the wrist is naturally extended, which encourages better pencil grasp and control. Fascinating!
Not to mention the immense concentration required to trace your name backward.
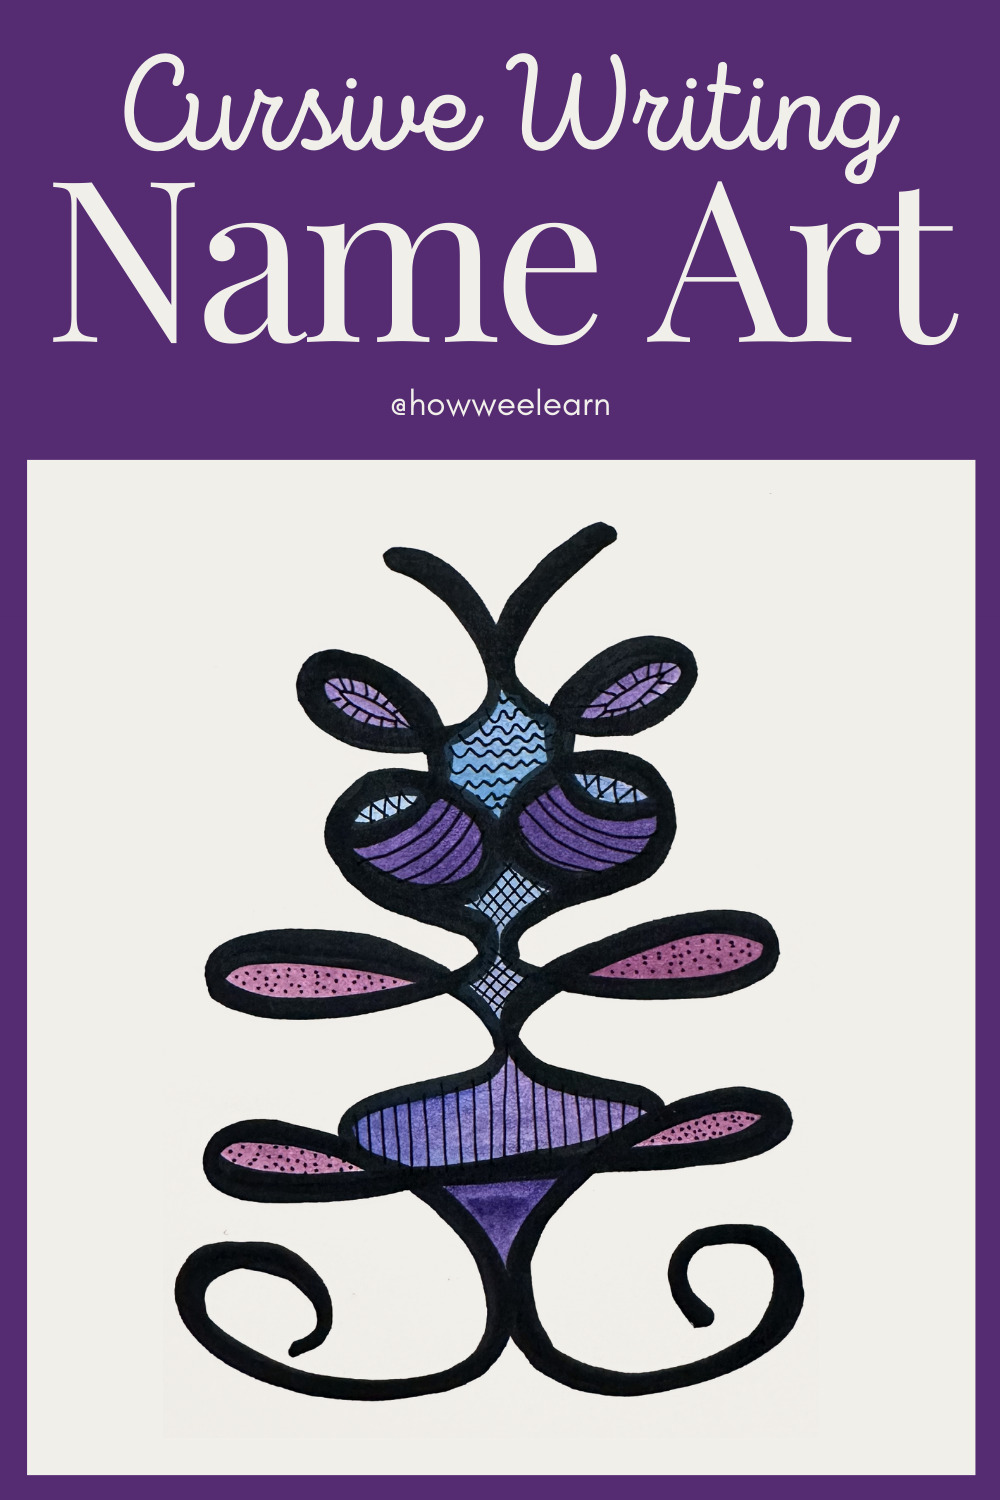
Okay, back to the name art! You’ll now have your symmetrical name art ready to color and decorate!
Step 3: Color and Decorate Your Cursive Writing Name Art
If you used a pencil for Step 2, trace over your lines with a black marker or Sharpie, then erase your pencil lines. Now you’re ready to have some fun coloring and decorating your cursive writing name art!
You can use anything you’d like for this step—crayons, pencil crayons, markers, paint, you name it.
If you have a fine-tip pen or Sharpie, you could also draw shapes and patterns in the spaces, similar to a zentangle.
There are no rules for this part; just have fun!
And trust me… you’ll want to keep making more and more of these with different names and words. It is so fun to see how each one turns out!
We think that Norah’s name art looks like a little grasshopper. And does anyone else see a meditating alien in our friend Chloe’s name art? No? Just me?
 |
 |
I hope you enjoyed creating your cursive writing name art!
If you would like to give your little one more cursive writing practice—from mark making, to letter formation, to writing words and sentences—take a peek at my newly released How Wee Write in Cursive! It guides you through teaching your child how to write in cursive step-by-step, slowly building up their writing stamina and technique.
Check out How Wee Write in Cursive:
https://shop.howweelearn.com/products/how-wee-write-in-cursive
 |
 |
 |
 |
Thank you so much for reading, sweet friend!
xo
Sarah



Leave a Reply