Have you ever used the mason jar method for a seed germination experiment?! It is so neat to watch a seed sprout and grow, and to see the root structure take shape. It also makes for an awesome seed germination experiment, comparing roots and sprouts and how quickly each grows!
In this blog post, I’ll share with you exactly how we set up our seed germination experiment, a Free Printable Seed Growth Tracker, AND the results with the best seeds to germinate with kids!

Seeds and Plants Family Unit Study
This seed germination experiment is one of the hands-on activities from my Seeds and Plants Family Unit Study.
If you’re new here, let me explain. This unit study, like all of our ever-growing library of unit studies, takes one big topic—Seeds and Plants—and breaks it down into ten manageable, bite-sized learning topics. This format gives you the freedom to dive into learning at a pace that works for your family.
Each of the ten topics included with a unit study contains everything you need for that topic, including:
- a curated YouTube video,
- suggested information to read,
- a “what’s happening” section,
- an interesting fact,
- a discussion question,
- literacy and math extension questions,
- and an ultimate-can’t-be-beat hands-on activity!
Perhaps you do one topic per day, perhaps one per week. Whatever suits your fancy! You can learn about seeds and plants and explore one of the 10 topics from start to finish in about 1-2 hours.
Printable Seed Growth Tracker
Within the Seeds and Plants Family Unit Study, your little ones will observe and document how their seeds grow with this Printable Seed Growth Tracker. You can grab it for FREE right here:
Seed Germination Experiment: The Set-Up
For this experiment, we’re going to germinate our seeds using the ‘mason jar and paper towel’ method. With this method, kids can see the seed sprout and the root structure form, giving them the real-life learning they need to understand what’s happening beneath the soil!

Materials
For your seed germination experiment, you will need:
- a glass jar
- paper towels
- water
- and seeds!
Instructions
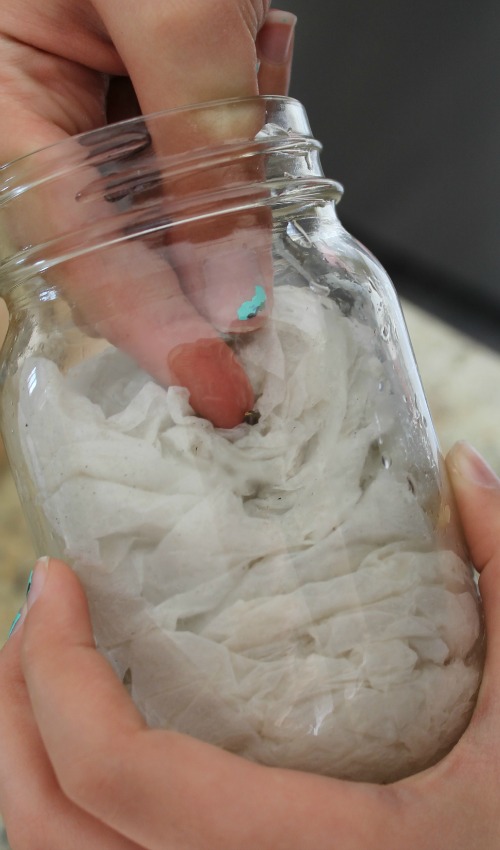
First, we pushed sheets of paper towels, one at a time, into the glass jar. Once it was full, we added some water to wet it (dumping out any excess). Wetting the paper towel made room for a few more pieces to be pushed into the jar and then wet again (and again, dumping out any excess water). We made sure the paper towel was rather packed so the seeds would stay nicely in place next to the glass.

Next, we picked four seeds to germinate: beans, snap peas, cucumber, and swiss chard. We pushed each seed down the side of the glass jar and supported them with the wet paper towel when pulling our fingers out.
We added all four of our seeds to one mason jar, but you could also set up separate mason jars for each of your different types of seeds.
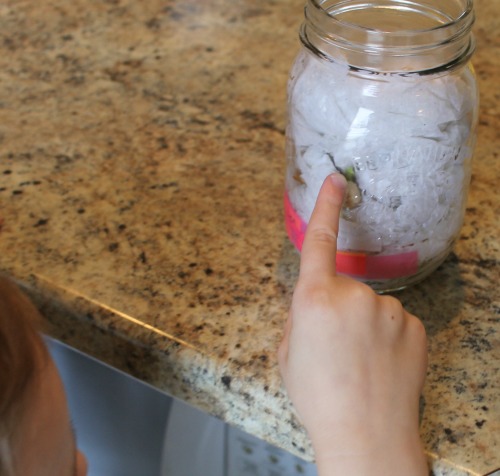
Finally, I labeled each seed so we could make observations and comparisons.

Seed Germination Experiment: The Results!
One of the reasons I love doing seed germination with kids is how quickly the seeds start to grow. For this seed growth experiment, our seeds started to root on Day 2! By the next day, there were sprouts, too. And by Day 5, three of our four seeds were growing strong!
These are the seeds that we chose to germinate:
- Snap Pea
- Bean
- Swiss Chard
- Cucumber
So, how did our four seeds compare?
Here is a little run down of our results, though yours may, of course, be slightly different.
Day 1 – Despite checking a gazillion times, nothing happened.
Day 2 – Snap Pea rooted.
Day 3 – Snap Pea started to sprout, and Bean started to root.
Day 4 – Bean started to sprout, and Swiss Chard started to root (though it was tricky to see!).
Day 5 – Snap Pea, Bean, and Swiss Chard were all rooted and sprouting.
Day 6 – Bean overtook Snap Pea for the tallest and strongest plant.
Day 7 – All growing strong! (Except for the Cucumber…)
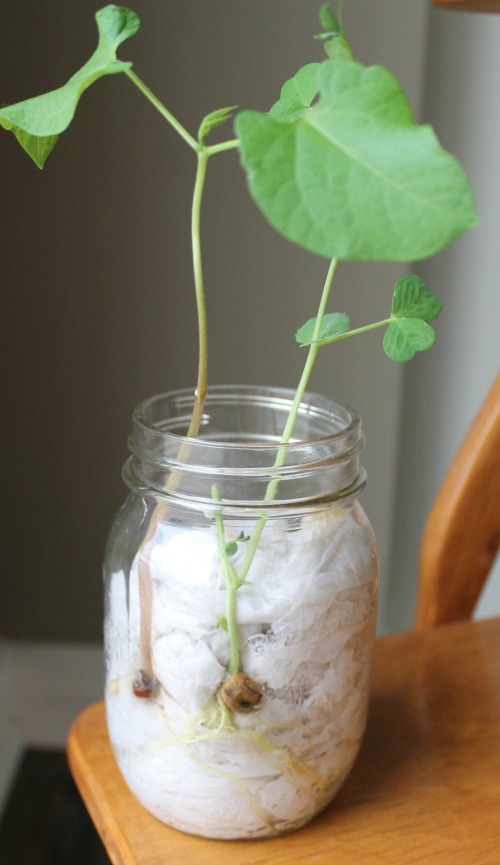
We had the best success with snap pea and bean seeds. Both grew fairly similarly, easily, and strongly. The roots to the snap pea were a bit easier to see, but the bean seed looks really neat as it sprouts!
So, What’s the Best Seed to Germinate with Kids?
So, if I were forced to choose between a bean or a snap pea seed to germinate with my little ones, I would choose—after a long and restless night’s sleep debating the choice—Snap Pea!
The root system on a snap pea is really fascinating—and that is why I do seed germination for kids in clear jars with paper towels: so they can see the root system.
Truthfully, we didn’t do too many activities while we were observing our seeds sprouting. It was mostly casual conversations. But conversations themselves can be one of the most powerful learning tools of all!
We made predictions and comparisons, developed new vocabulary, and—most importantly—marveled at how miraculous the whole process is.
This is one of the simplest ways to introduce little ones to seed germination. You can keep it simple, or turn it into quite an all-encompassing endeavor! Whatever floats your boat. Our boats are currently floated in a shallow stream… some days, a puddle…
More Seed Activities for Kids
If you’re looking for more seed activities, be sure to check out these 35 Seed Activities for Kids. And if you’re feeling crafty, I have tons of Seed Art Ideas for Kids as well.
And if you would like everything planned for you, I encourage you to check out my Seeds and Plants Family Unit Study!
Seeds and Plants Family Unit Study
https://shop.howweelearn.com/products/family-unit-study-seeds-and-plants
 |
 |
I hope you find these seed activities helpful for you and yours!
Thank you for reading, my friend,
xo
Sarah

The fail-safe ones are my favorite! lol! I love that this is just a casual experiment that still puts the roots (pun not intended) of science in their minds! 🙂
Really helpful for my sons science project. I appreciate you sharing a lot! Thank you. We aren’t finished with ours however it’s a little more complicated. But wanted to say again appreciate your share! Great job!
We always had the best success with nasturtium seeds.
Oh interesting Theresa! I have never tried sprouting these seeds. I will have to give it a go!
Hi, Did you just fill the jar up with wet paper towels? really wet? or misted wet? I’m trying to figure out how the seeds sit against the side of the jar.
thanks
Hi Christina,
Great question! The trick is to really fill the jar all the way with paper towels. Rip them off one by one and shove them in the jar. Then add lots of water to wet them down and continue to fill the jar again with the paper towel, wetting them down and repeating until the jar is totally full. Then dump out the excess water and press the seeds in. We then water the jar every two or so days and dump out the excess water. Hope this helps! I actually have a video coming out with more details next week. I will be sure to link it here!
Where can we find the video? Love this idea!
Thank you so much! You can check out the video in this blog post: https://www.howweelearn.com/two-spring-learning-crafts-we-love/
Where did you get your seeds? Is it something I can just get at any store? Thank you. I nanny and always looking for learning amd fun things to do with her.
Hi Faith! Yes, any store at all. The dollarstore carries seeds as well. I hope you have fun!
Also, where in the jar did you put the seeds? On the sides? Do I put the different types of seeds in different jars?
Yes! Once the paper towels are stuffed in the jar you can just slide the seeds in between the jar and the paper towels. You can put them in different jars, or pop them all in the same jar. Anything goes!
Radish seeds sprout really fast as well. I’m a teacher and I use a plastic glove ( the large ones that cafeteria workers use) and instead of paper towels I use cotton balls. One cotton ball and one seed for each finger. Dip the cotton ball in water and wring out the water so that its damp and not dripping. Hope this helps anyone and thanks for the seed ideas!
Great tips, Lindzi! Thank you!
Hi Sarah,
I have done this with many students. I had over 1200 students come to our conservation days and we showed them how to do this. With so many kids buying packaged seed was out of the question, so I just bought a bag of beans from the grocery store and started the process the night before by soaking them overnight. Then the bean seed germinated faster. Also corn seed can be used. Neither need to be soaked but it does speed up the process.
Just found your site. I was looking for fun easy experiments for my grandson who is 3 years old. I taught science for 35 years but, have been away from it and needed some inspiration, you know that oh yea, that would be a great one for him to do.
Thank you.
What a great tip, Brenda! Thank you so much.