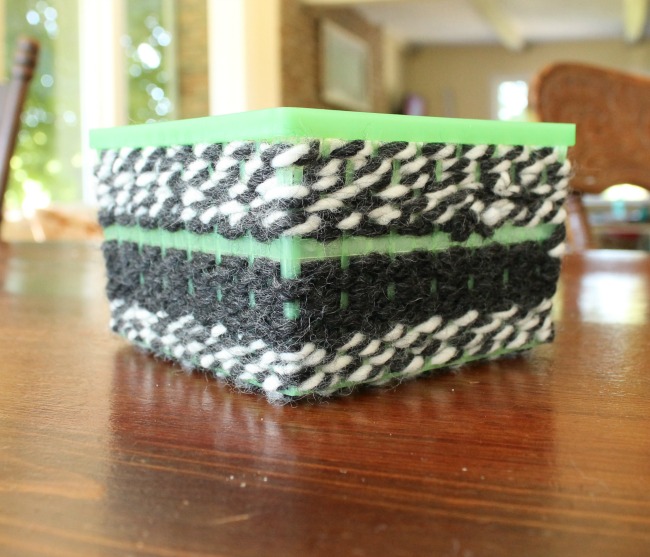
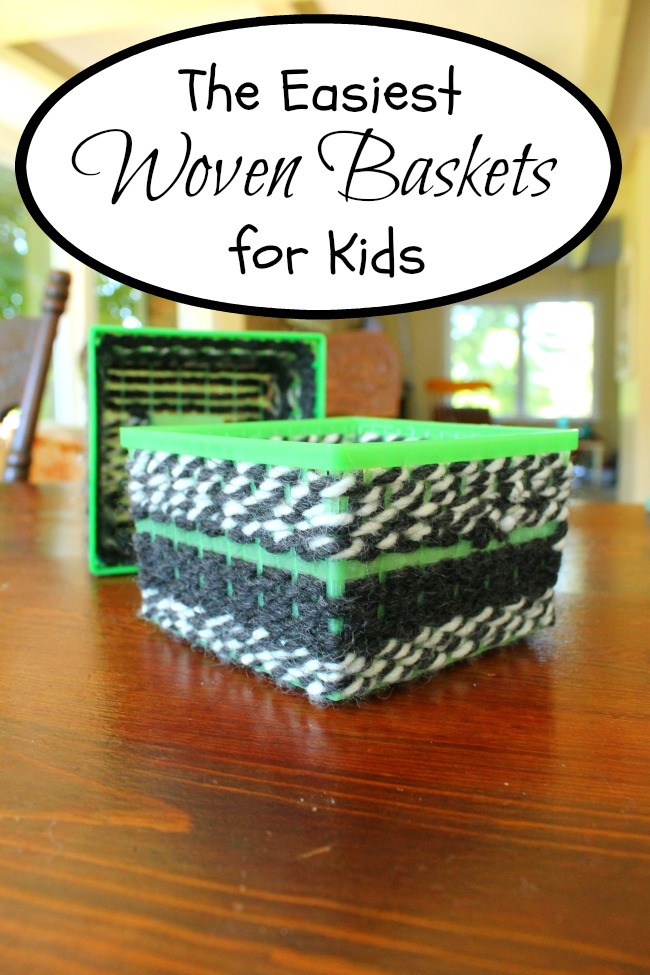
It’s that time of year for all of those fresh, local berries and goodies! We have been visiting our local farmer’s market each week and each week I am so thankful that there are gardeners far better than I. This also means that we have been getting oodles of those green plastic baskets too. And oodles of anything in this house means a craft is a brewing. This time we turned those plastic baskets into easy woven baskets.
I just love a good weaving activity – don’t you? So much math involved in such a beautiful craft.
But first – a little bit about our garden – it is really not at it’s best this year. We have had some major heat waves, coupled with some weed attacks too. I am really struggling to keep up! But we are still having some yummy fresh things come to our table from that crazy garden. The zucchini have started to arrive and some green beans too. Cucumbers are close behind and we still have asparagus as well.
Berries are something that I cannot figure out how to grow here. The raccoons get the berries just before they are ripe, and it is impossible to keep those raccoons away from my berries. I have tried so many things! Our neighbours actually use electric fencing around their berry patch – now that would work.
Anyways – back to these easy woven baskets for kids:
Ben is still working on patterning and I thought that weaving might be a great way for him to practice patterning (over, under, over, under, etc). It finally clicked that we could use those little plastic baskets to weave into woven baskets. They looked so cute I thought I would share them with you.
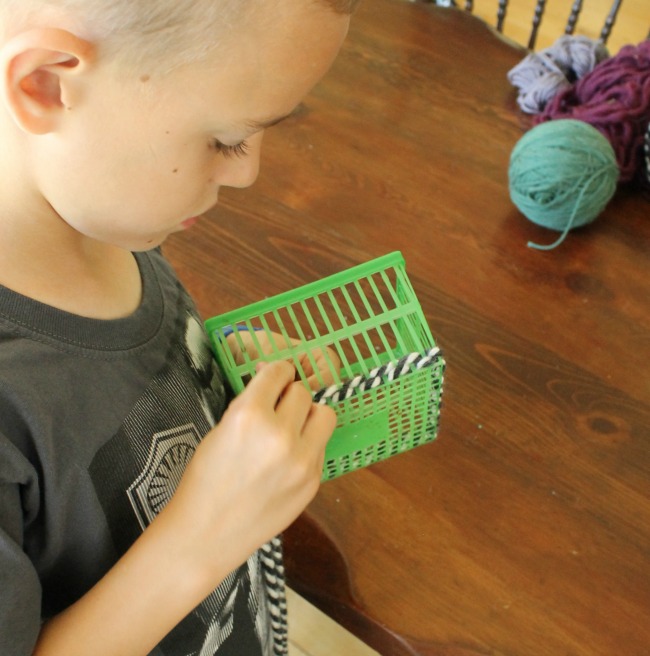
This woven craft is really quite simple. It does take awhile to complete though. We used fairly chunky yarn but next time I would use even thicker yarn. Start to finish it took my 8 year old about 2 hours. Ben (who is 5) and I did it together, on again and off again, over the course of a weekend. It was actually really nice to see them persevere on a project that took some real dedication.
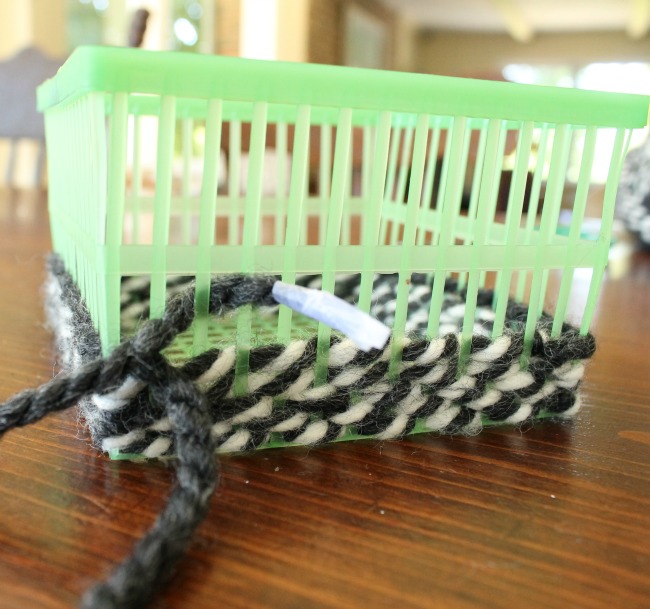
For this weaving craft, we started by cutting a long piece of thick yarn (the thicker the better). I tied one end to the bottom corner of the plastic basket and I wrapped some clear tape around the other end of the yarn, giving it a bit of a sturdy point. Next, the boys weaved – over and under, over and under, around and around and around the basket. We would add more yarn when needed by tying the new yarn to the old and adding new tape to the new piece of yarn.
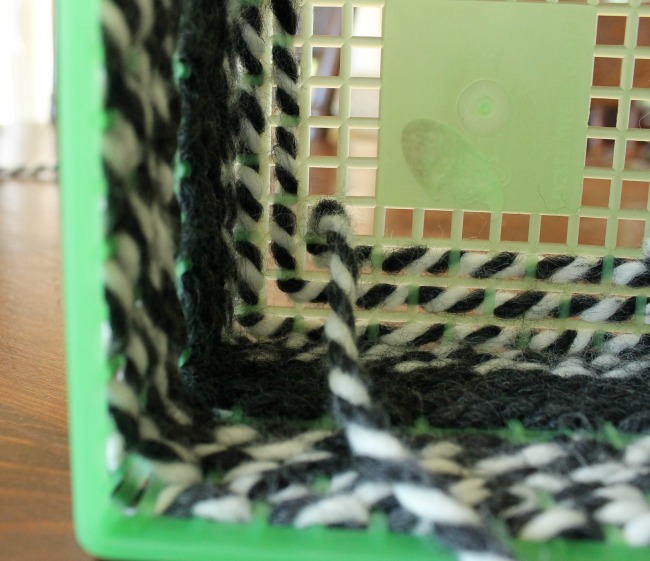
Once the sides were done, they also weaved the bottom of the plastic basket the same way.
Once the baskets were done we noticed you could still kind of see the green plastic baskets through the yarn in some places. We decided when we do this again we would paint the plastic baskets first the colour of the yarn. Not that it was a big deal, just always looking for ways to improve.
This weaving craft was nice and simple and a great way to practice patterning. We could mix it up next time by changing the pattern: over two, under one, over two, under one. Or we could do two rows one colour and then switch to a different colour of yarn for the next two rows. So many ways to play with patterning.
I hope you are having a fabulous day friends (and that your garden is looking better than mine), thank you for reading!

Hello,
I’d like to try this with a small group of 8-10 year olds. How long do you think I should cut the yarn pieces to keep it manageable for that age?
Thanks!
P.s. what a great use for those!
Alicia
Oh super question Alicia! I always make yarn the length of my child’s outstretched arm. I find this length works well, lasts quite a long while, and is not too overwhelming. Hope that helps!
What age range do you think this craft would be good for? I teach a craft class for ages 10-14. Do you think this craft is more suited to younger kids?
It would definitely be appropriate for that age range.