Do you know what I am LOVING right now? How my Sam is at the perfect age for doing all of the crafty things I remember loving as a child. Like the bead loom! Did you have a bead loom as a child?
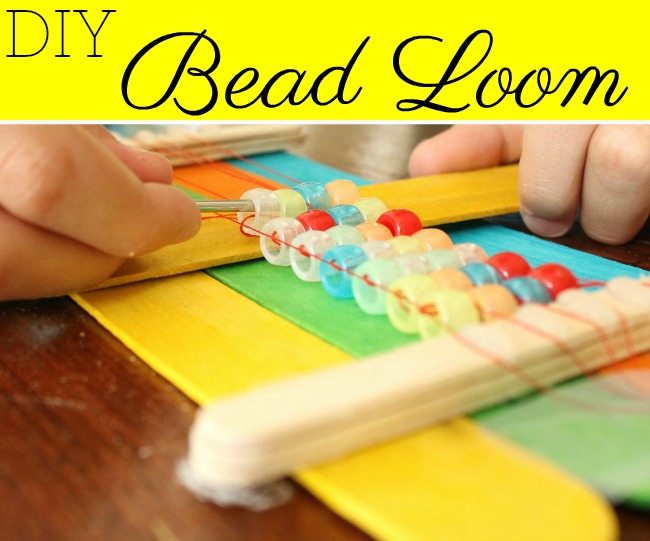
Before I bought him one, I wanted to try it out to ensure he could do it. We made this DIY bead loom out of popsicle sticks. I really like that we can use the big pony beads with this bead loom. It is great for teaching him exactly how to use one.
(This post contains affiliate links for your convenience)
Now this bead loom worked well, but was a bit more fussy than my bead loom from childhood. We just added more tape here or there to hold the strings in place as needed. If Sam really continues to enjoy this homemade version we will likely purchase a real one. This is the one on Amazon I had as a child and will be getting him. It does use the tiny seed beads, so will be tricky for little fingers though.
But, for now, the DIY bead loom!
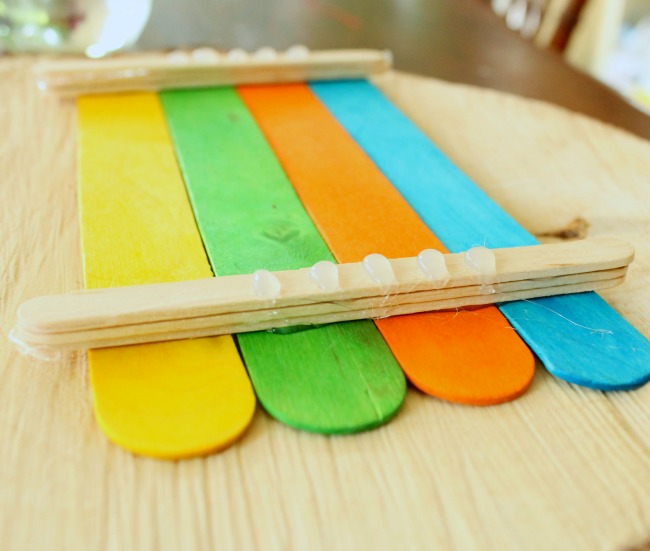
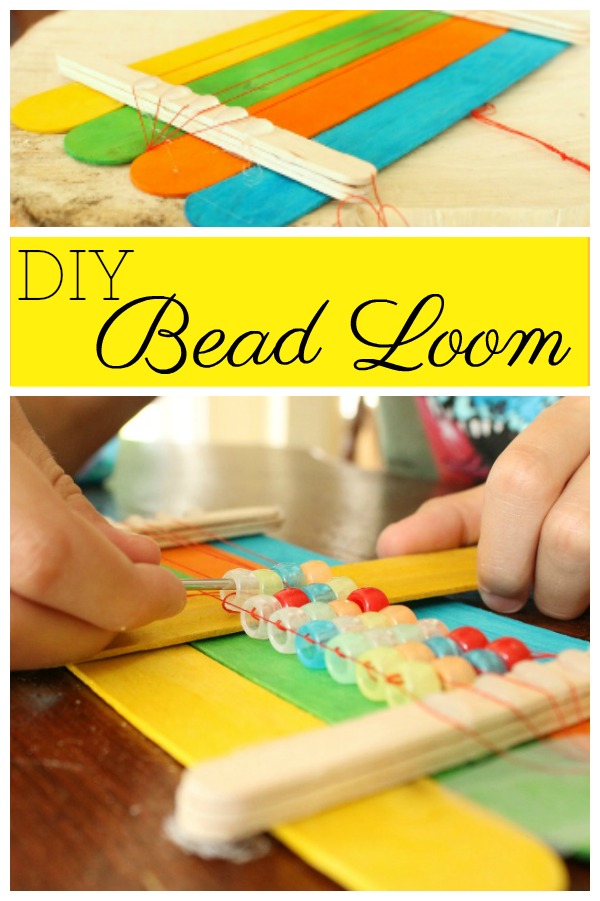
To make this bead loom we only used two things: popsicle sticks and hot glue.
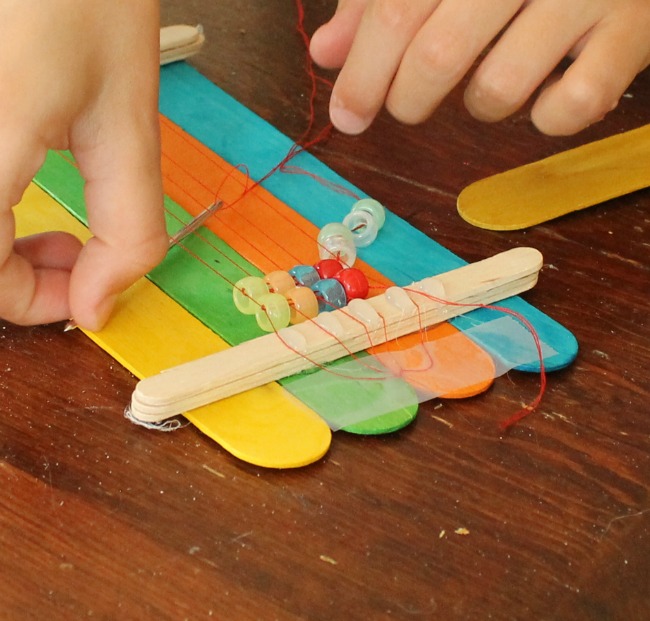
I began by setting out 4 big popsicle sticks side to side. I then hot glued a stack of 3 small popsicle sticks together and finally hot glued this stack onto the 4 big popsicle sticks to secure them in place.
Next, I added little globs of hot glue to the top of the small popsicle stacks. These globs were used to separate the thread when beading. I added 5 dots of hot glue, fairly evenly spaced to each of the two popsicle stick stacks.
Then I simply let it all dry. That’s it! Nice and simple and it held up very well also.
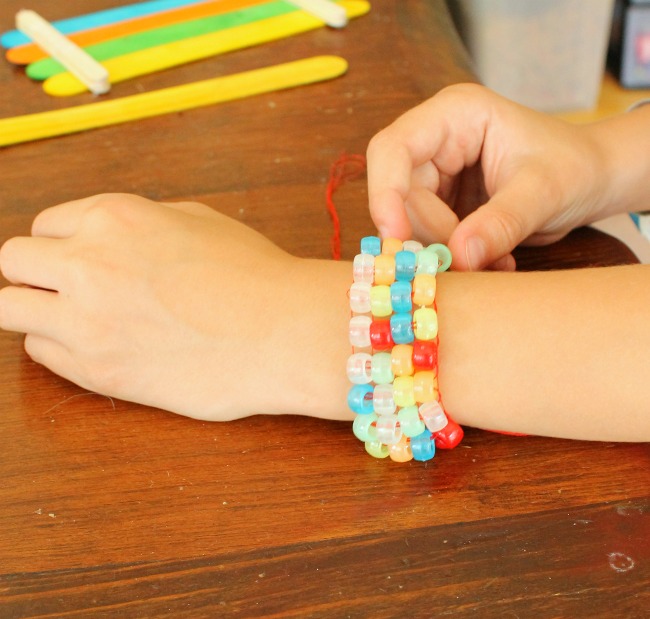
I thought I would also share with you how we made bead loom bracelets on this DIY bead loom, just in case it is new to you.
My instructions for making bead loom bracelets seem good to me – but I have been making them since childhood! So please leave me a comment below if you need clarification and I will do my best to clarify. I would really appreciate it.
How to make Bead Loom Bracelets on our DIY Bead Loom:
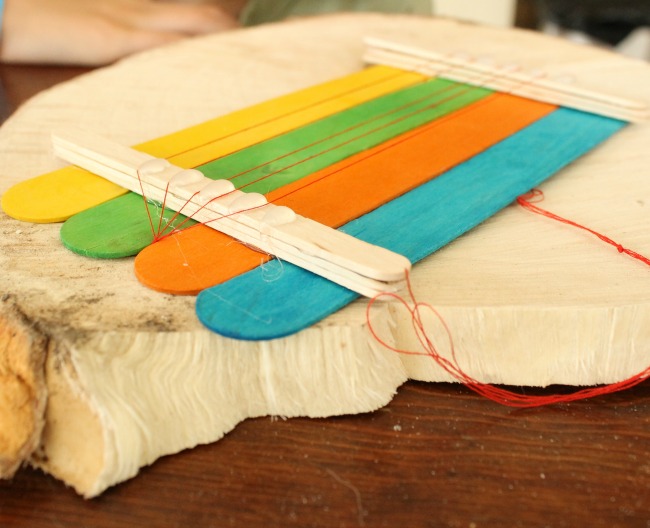
To begin, cut 5 pieces of string the same length and knot them all together at one end. Leave a distance slightly longer than your wrist and knot them again at the other end.
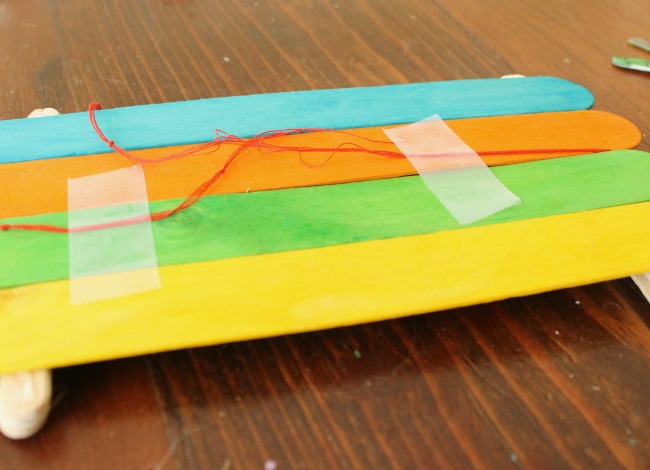
Secure one knot behind the DIY bead board with tape. Spread the five strings out using the dots of hot glue to hold space in between each string. Stretch it over to the other stack of popsicle sticks and use those dots of hot glue to continue to hold the space in between each string. Finally secure the second knot to the back of the DIY bead board with tape, pulling the threads nice and taut.
You are now set to start beading.
Cut a length of thread about as long as your arm and secure one end to the bottom thread of the bracelet strings stretched across the bead loom. Thread a small, dull needle onto the other end.
Now, thread 4 beads onto the needle and let them drop down the thread to the knot (right against the bottom string of your bracelet).
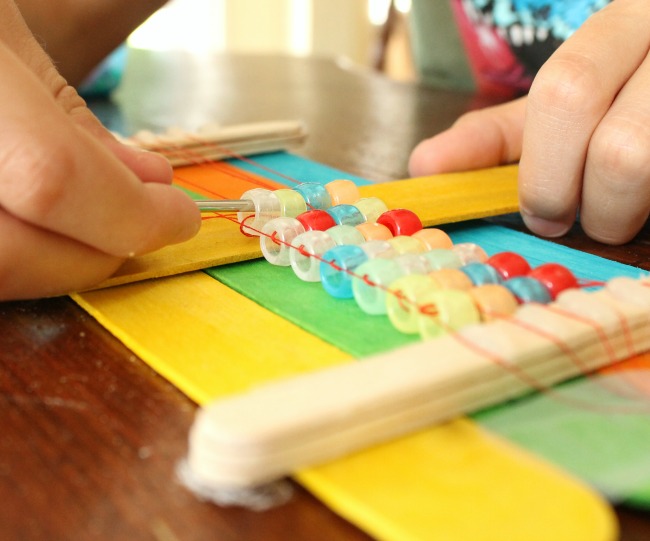
Take your needle and put it underneath all 5 bracelet strings that are stretched across the bead loom. You will notice the beads go under the 5 bracelet strings as well.
Using your fingers or a big popsicle stick position the 4 beads in the spaces of the 5 strings.
Next, using a big popsicle stick, push those beads up in between the spaces. Thread the needle through the top half of the beads coming back towards you. The needle should be going OVER the 5 bracelet strings this time and will end up back at you right where you started. Pull the thread taut, and begin again by adding 4 more beads.
You can make patterns, designs, even letters and names once you get the hang of it!
For thicker bracelets, simply use more than 5 bracelet strings.
I remember my friends and I doing bracelet sales in the summertime and making a small fortune! This craft is perfect for the little entrepreneur in the family – and won’t cost you an arm or leg either.
I hope you like this DIY bead loom tutorial and I really hope it was clear enough to follow my instructions. I should make a video tutorial to accompany this one. Just let me know if that would be helpful.
Thank you so much for reading Mama – I hope you are having a wonderful day!



You didn’t mention how to end the bracelet…what do we do when we get to the end?
So I didn’t! Thank you Jackie. To end the bracelet, knot the thread your beads were attached to with the top string held on the loom. Hope this is clear!