I am going to hold back my building excitement for the season just around the corner. There is yet to be any substantial snow on our homestead, and we still have many beautiful Fall leaves. So for the sake of enjoying each season to the fullest – and not rushing myself in to the (seemingly, come February) loooong winter ahead, I have one last Fall craft to share. A beautiful one too.
This Fall fairy craft is quite straight forward, and while it could be modified to do with little ones, this version is likely best for those over the age of 7 or so.
We have started back at our local Waldorf school one day a week. I really, really love our Waldorf school. I love so much about the Waldorf philosophy of educating children. The connection with nature, and likely most importantly, the slow introduction to the academic world. With a focus on experiences in nature and in the classroom, a focus on building writing skills through meaningful play, and building listening skills through story telling, it is a lovely fit for how I seek to raise my children.
While we were there this past week, I created this Fall fairy craft. I do love crafting, so would never dream of passing up an opportunity to create! And fairy crafts? Well, who in their right mind, crafter or otherwise, could resist? (John is reading this and giving me a bizarre look, so perhaps the love of Fall fairy crafts is not Universal). Regardless, should you be a Fall fairy crafter, have I got the craft for you!
To create these whimsical, dancing fairies you will only need tissue paper, string, a needle, and a stick
We used orange, red, and yellow tissue paper.
Begin by selecting two colours of tissue paper, stacking them on top of each other, and folding them in half.
Next, cut a leaf shape out of the tissue paper, with the base of the leaf on the fold of the tissue paper. Do not cut the fold. You may wish to use a leaf template cut out of cardboard to make this easier – trace it on to your tissue paper and cut around the leaf shape (but not the base of the leaf, leave the fold in tact).
Just be sure you LEAF the fold alone (Get it … leave — leaf …. hmmm, perhaps only other Fall fairy crafters will appreciate that one)
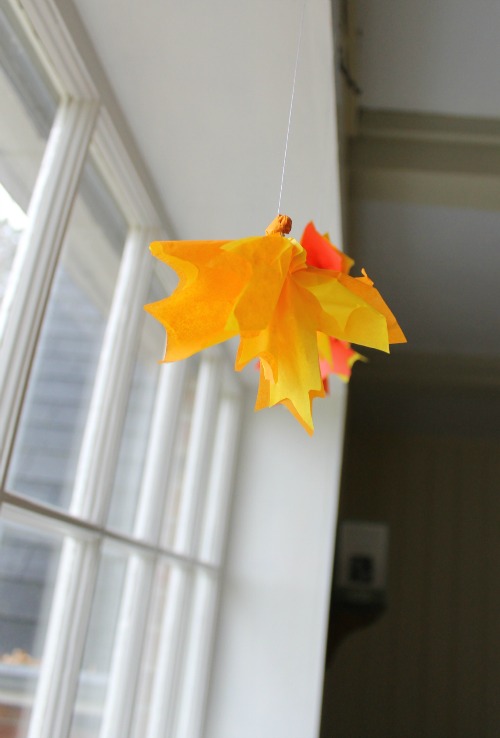
Unfold your tissue paper. Now you will have two leaf shapes attached together by the base of the leaf (in both of the colours you chose)
Crinkle up a little bit of tissue paper into a ball. Place that in the middle of your cut out leaves, where the base of the leaves are still attached. This will be your fairies head.
Gather the tissue paper around this little ball, to form a tiny neck. Take a long strand of string on a needle and wrap the fairies neck with it. A great way to do this is by piercing straight through the neck, then wrapping the string around the neck many times. At the end, pierce the needle up through the top of the head, so the string comes out right through the middle of your fairies head. (And yes, I agree that paragraph sounds horribly gruesome).
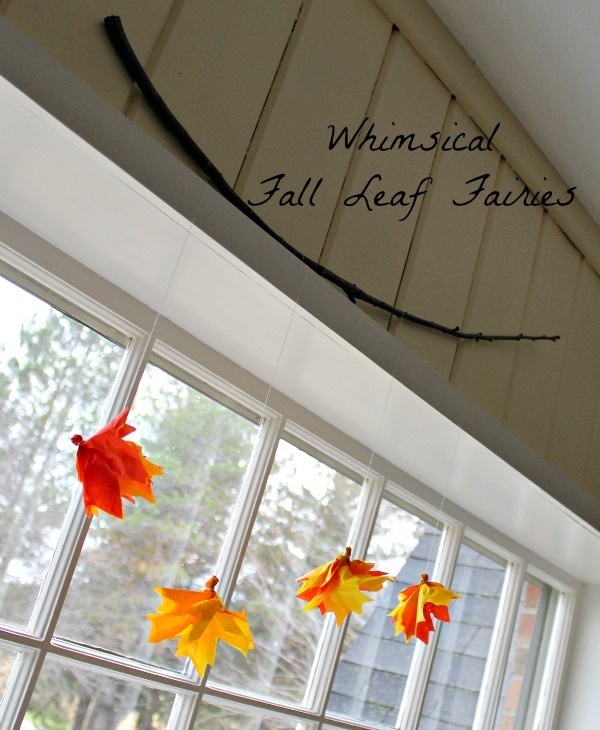
Finally, tie your little Fall fairy onto a stick, and make her some friends.
I placed our stick above our window frame and they look so whimsical dancing in the sunlight.
This little fairy craft could be done for every season too. We plan to make some this winter with tissue paper snowflake fairies – I am thinking shades of blue and white would look lovely.
And there you have how to make a lovely Fall fairy craft! A simple way to add a touch of whimsy to any playful space in your home.
Please consider liking us on Facebook so we can share more creative learning activities with you and your little ones! Thank you.


These are just beautiful! We love all things fairies here, too!
Thank you Devany! I just had a chance to check out your Yarn Wrapped Turkey – how ADORABLE!!