How would you feel if you were outside at night and could tell time using the stars? Like the coolest person ever? Yep. I get that.
Well, buckle up, buttercup, because today we learn to tell time using the stars!
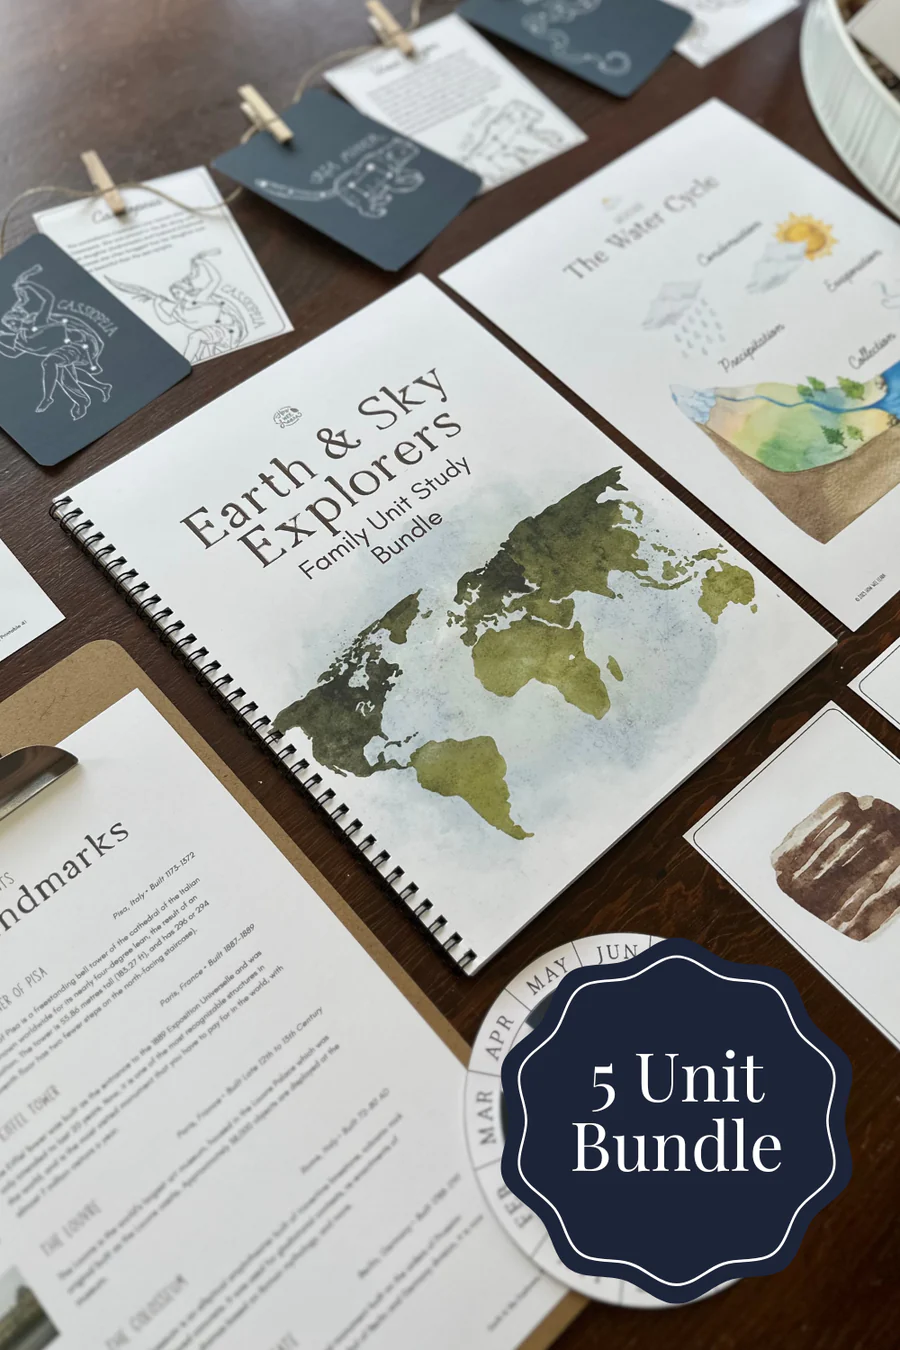
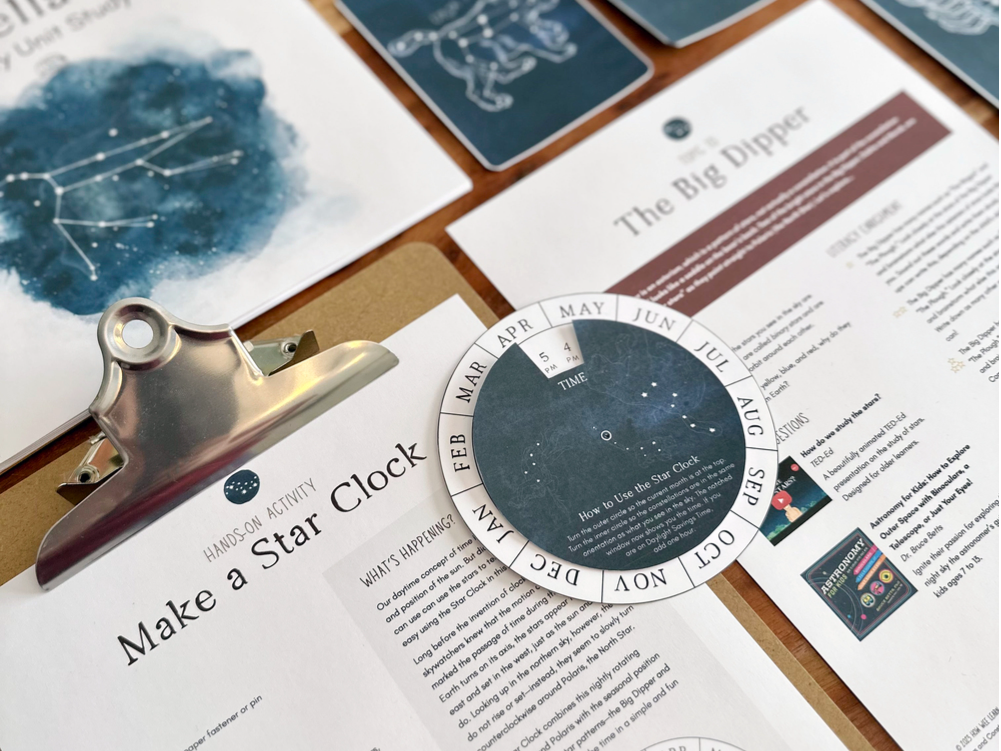
But first… if you and your little ones love stars as much as the family on the other side of this computer (mine!) you are definitely going to want to grab my Stars and Constellations Family Unit Study. This unit study is perfect for the whole family to enjoy together, for children ages 4 to 12 and their caregivers.

In the unit study, you will find this star clock along with lots more information, hands-on activities, and 9 more fabulous astrological adventures.
Take a peek at the growing library of unit studies right here:
https://shop.howweelearn.com/collections/family-unit-studies
 |
 |
 |
Now back to helping you become the coolest person ever!
How to Tell Time by the Stars
Alright my star-gazing friend, let’s start things off at the beginning. To use your printable star clock, you will need to be able to find Polaris, also called the North Star.
Step 1. Find the North Star (aka Polaris)
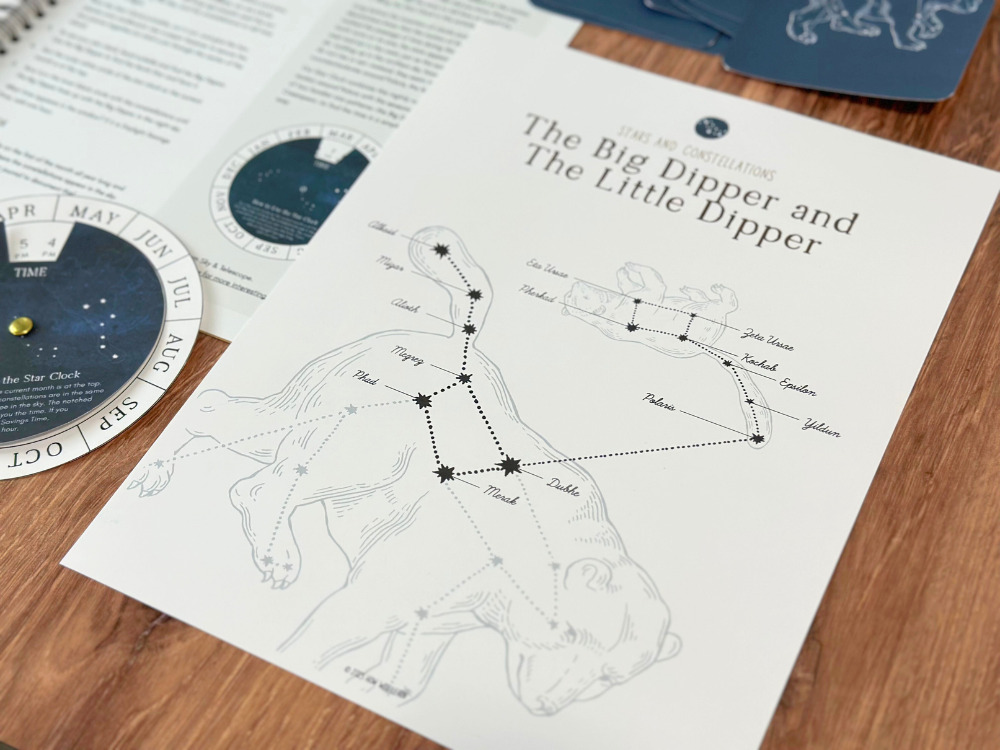
To find the North Star, you are simply going to hunt for the Big Dipper.
Fun fact! Did you know the Big Dipper isn’t a constellation? It’s an asterism! The Big Dipper is seven of the brightest stars in the constellation Ursa Major.

Once you find the Big Dipper, look for the two stars at the end of the Big Dipper’s “dipper.” These two stars point straight to the North Star, the first star on the Little Dipper’s handle (the constellation Ursa Minor).
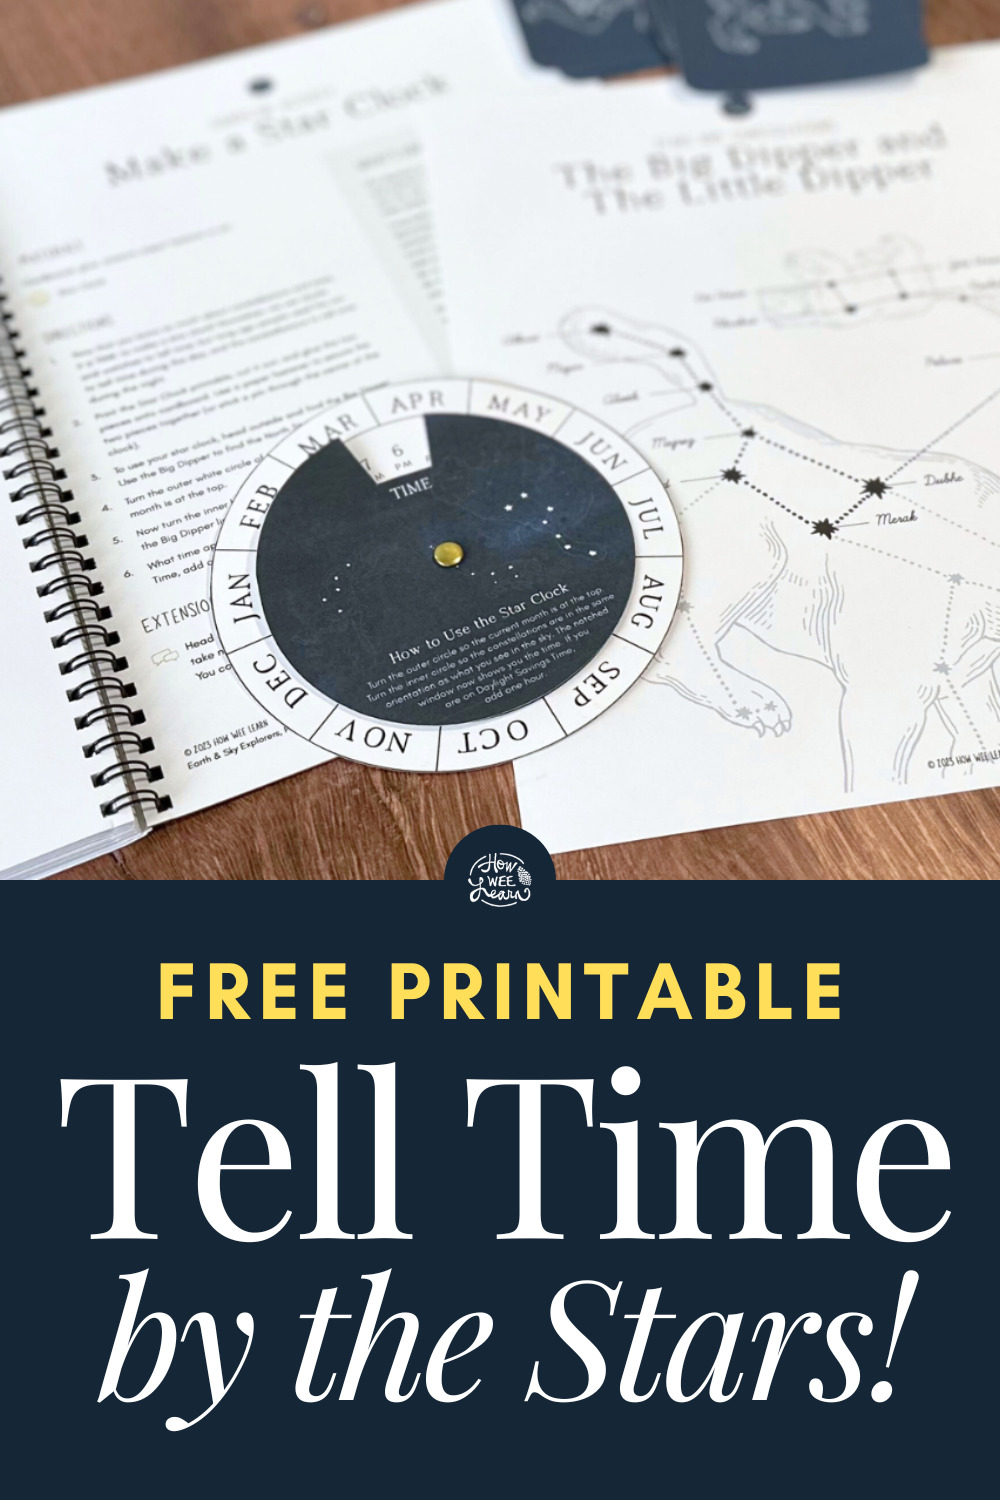
If you’re confused, don’t worry! A handy printable showing the Big and Little Dipper, the star names, and how to find Polaris is included with this freebie as well. You’ll be able to blow everyone away with your star knowledge, you smartie you.
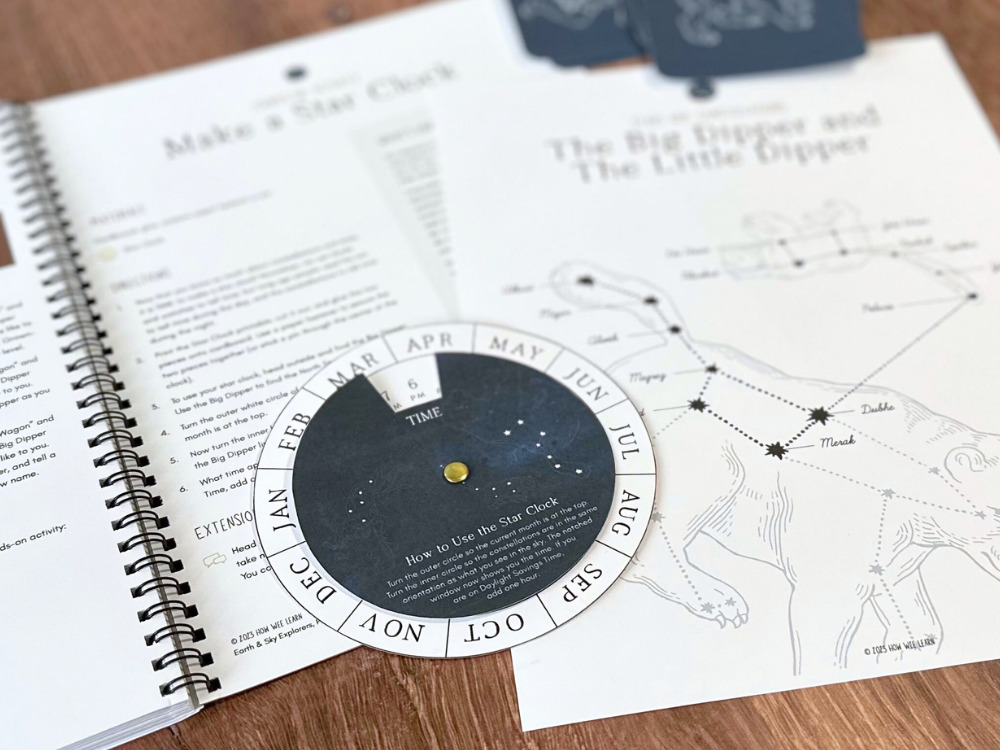
Step 2. Create Your Star Clock
Alright. Now that you know how to find the North Star, you are all set to use your star clock! Print your star clock off (you can grab yours for free at the end of this post) and cut out the two paper circles. Glue those circles onto some cardboard so they are nice and sturdy—cereal boxes work well—and then cut the cardboard around those circles too.
You will have two cardboard circles, each with your printable star clock discs on them.
Now place the one with the months and times behind the dark blue disc and secure it with a metal brad. If you don’t have one, you can poke a pin through and put a little bit of playdough or an eraser on the other end so as not to poke little fingers.
Voila! You are set to venture outside and become the coolest person.
Step 3. Become the Coolest Person (and Tell Time by the Stars)
All you need to do now is stride confidently outside with your star clock and locate that North Star. Adjust your back wheel so the current month is at the top. Then turn the little circle until the Big Dipper on your wheel are in the same orientation as the Big Dipper in the sky. Look at the number in the notch, then proclaim for all around you—THE TIME!
(You might want to do this a few times on your own prior to proclaiming it loudly to others. Speaking from experience…)
If it is daylight savings time, you will need to adjust your time by adding one hour (also keep that in mind during your proclamation).
And there you have it, my friend! You are now the coolest person ever. Be sure to help your little ones become the coolest people ever, too, and get my Stars and Constellations Unit Study!
Grab your FREE Star Clock Printable right here:
Thank you so much for joining me!
xo
Sarah

Leave a Reply