Hatching chicken eggs with kids has to be one of the most rewarding experiences I have ever had. Nature is amazing and watching little ones experience this first hand is incredible. The marvel, excitement, and oh all that learning! This is my third time hatching eggs with kids, though my first time doing it at home instead of in the classroom. I really want to share this experience with you and provide you with as much information as I can so you can see how TRULY manageable this science activity is to do at home with your kids!
I have decided to break this topic down into 3 parts: How to Incubate Chicken Eggs with Kids, Stages of Embryonic Development and Activities to do while Incubating, and finally The Hatch and Going Home. My hope is that these 3 posts will provide you with all the confidence you need to take on this science activity with your little ones at home. And, I should mention, we live in the city. We were able to find a fantastic farmer who has “lent” us eggs to hatch and will take our chicks back to his farm when we are done. I will tell you about how we did this below too.
Before I begin “How to Incubate Chicken Eggs with Kids” I need to tell you that I am absolutely no egg hatching expert. I have done this but twice before, have learned a lot both times, and I know I have much, much more to learn. BUT – both of my previous hatches were quite successful – which should let you know how truly manageable this activity is – even for someone with NO experience (and I mean none. I had never even touched a chicken prior to my first hatch … well that may be an exaggeration, but you get the point!).
The information I outline below is from many books and online sources I read when I was contemplating this activity for the first time a few years ago. I am afraid the sources are all garbled in my head. But 3 wonderful sites I have used regularly for any chick hatching questions are:
The Chicken Chick (love this one for everything!)
Chickscope (this one is great for the developmental stages)
The Poultry Site (this one is fairly scientific, but really informative)
How to Incubate Chicken Eggs with Kids
Lets start with the basics. Chicken eggs incubate for 21 days, with some hatching as early as 19 days and others holding out until Day 23. Much like babies, they don’t all come on their exact due date. I have not incubated quail or duck eggs, but I have heard this is also a manageable at home science activity. It is important to only incubate one breed at a time, as each incubate for different lengths of time.
There are 3 essential things you need to incubate chicken eggs, and 2 that are not essential, but very helpful.
1. Fertilized Chicken Eggs (very essential … ahem … very). I placed an add on Kijiji (which is similar to Craigslist, or Gumtree depending on where you live). My add simply stated what it was that I wanted to do. I was seeking a dozen fertilized chicken eggs to hatch with my little ones and then would like to please give the chicks back. Within one day I had over ten responses from local friendly farmers eager to help me out. The world is a good place – full of friendly, helpful, and kind people. I messaged back a few of the farmers and within a few days had 12 fertilized chicken eggs! Thank you Farmer Chris!
2. An Incubator. I was able to borrow an incubator from a friend … and I use the term borrow loosely as I have had it now for almost five years. My very first year hatching, when I was very much still learning all about how to incubate chicken eggs with kids, the farmer who provided us with eggs was also willing to supply the incubator. It is definitely worth adding this to your post when looking for fertilized chicken eggs – you never know! I happily lent mine out last year when we weren’t using it – ummm … I mean lent my friends incubator out when we weren’t using it. There are also places which rent incubators, according to my quick Google search, so perhaps you have one of these places nearby. Otherwise, they can be purchased through Amazon. Here is an affiliate link to one very similar to the one we use, which is the least expensive but works fantastic (just click on the picture below).
3. A thermometer. I use a very plain and simple dollar store plastic thermometer. I lay it across the top of the eggs and I find it measures the temperature just fine.
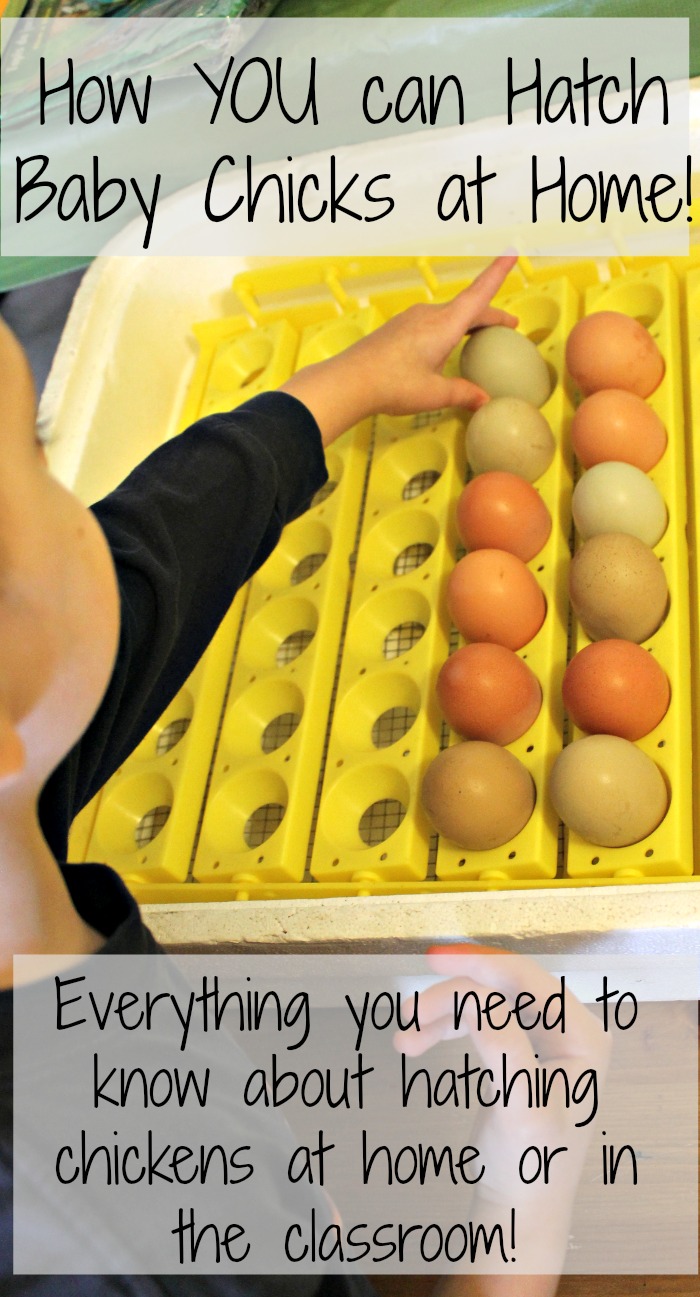
4. An egg turner (not essential, but a HUGE time saver). I have used an egg turner for each hatch – and I am not sure I would want to do a hatch without one! The eggs need to be rotated multiple times a day to develop properly. By using an egg turner, it avoids all of the turning. I simply put the eggs into the egg turner and leave them until Day 18 when I take them out of the egg turner and keep them still until they hatch. Egg turners can be found the same way as incubators. And in case you are looking to purchase one, here is an affiliate link to Amazon for the one we use (just click on the picture).
5. A hygrometer (which I just learned the name of right now as I Googled it for this post.) This neat little gadget which resembles a thermometer measures humidity. I did not have one for my first hatch, but did for my second and found it well worth the $5. We found ours at Walmart, but it can also be found at Home Depot and Hardware stores. It relieved a lot of my worry, as I was constantly checking to be sure there was enough water in the incubator. This gadget let me simply peek inside the incubator to see if the humidity level was as it should be.
Now that you know the supplies you need to incubate chicken eggs with kids, lets get to the actual How-To. And I promise it is ridiculously easy!
To begin, set your incubator to 99 degrees Fahrenheit. The ideal temperature for hatching chicken eggs is between 99 and 101 degrees Farenheit. My first year hatching I went a bit nuts trying to keep the temperature at EXACTLY 99.5 degrees … the second year I did not go as crazy, let it fluctuate a degree of two either way, and had an even better hatch. So there is no need to lose sleep over the exact temperature.
Next, add some water to the bottom of the incubator. Incubators come with a little plastic tray that covers the bottom of it. Fill this tray up with water. This is where the humidity measuring gadget comes in handy. You want to keep a 50% humidity level in the incubator for the first few weeks of incubating. If you do not have a humidity measuring gadget, you can simply keep the tray filled with water. You will know you have too much humidity if you see condensation forming on the eggs. Eggs have little pores which need air, so you want to be sure you do not have any condensation. I would highly recommend the $5 gadget though.
If you are using the egg turner, place this inside the incubator and plug it in too.
Once you have the incubator holding at (approximately) 99 degrees Fahrenheit and about a 50% humidity level you can add your fertilized chicken eggs. Place the eggs into the egg turner with the pointed end down. The little chick heads develop in the big round part of the bottom of the egg, so you want the egg upside down during incubation.
Then, the trickiest part of all … leave it be! The key to success, I truly believe, is leaving the incubator alone. When the humidity level drops, open the lid quickly to add more water, but otherwise try hard to leave the lid shut so the temperature remains constant.
In the next post I will talk about activities to do with the eggs while they are in the incubator, and about candling the eggs to find out which eggs are developing. But I will leave that for now.
On Day 18, finally, you can do something! On day 18 the eggs can be removed from the egg turner and laid flat in the incubator as they no longer need to be turned during the last few days before hatching. Also, increase the humidity in the incubator by adding more water, up to about 65% humidity.
And then the chick-watch begins! But I will save that for the third and final post on hatching eggs with kids.
I hope this post was helpful. If you have any further questions, or if you ARE an egg hatching expert and notice that I am giving advice that is not best practice, please leave me a comment or email me at HowWeeLearn@gmail.com. I am quick to return emails, and happy to help you through this adventure the very best I can!
Please consider liking us on Facebook so you can see our hatch in progress, and other creative learning ideas for kids too! Thank you!




So fascinating! Thanks for linking to After School Link Up and also sharing in STEM Tuesday. I wish our school had this set up, but I only saw it in one kindergarten classroom, unfortunately, not in ours.
Awesome! I especially love how the local farmers were so happy to help your family.
Thanks for sharing at the Thoughtful Spot Weekly blog hop!
Thank you Susan – yes, we were so lucky to find such a kind local farmer!
It would be a lot of fun and very educational to hatch chicks at home! This is a great resource for anyone thinking of giving it a whirl.
Thank you for stopping by the Thoughtful Spot Weekly Blog Hop this week. We hope to see you drop by our neck of the woods next week!
You can also do this through the local 4H and penn state cooperative extension. They lend you the equipment. Give you educational materials and worksheets and get you fertilized eggs for a reasonable cost. We completed the project three different years always finding homes for the chicks with local farmers who were more that willing to accept the chicks. Great project to do with kids especially if you homeschool as we did. My now adult children remember this as a real highlight from their school years.
Great suggestion – thank you Susan! Hatching chicks is absolutely one of the most memorable things I have done with my little ones too.
Wow I am blown away by this post! I have ALWAYS wanted to do this since I was a child. I used to take eggs from the fridge (I know I know) and lay them under my pillow and pray a little chick would hatch. That obviously wasn’t possible (no such thing as revival haha) I never thought of incubating them at home with my own kids. I am saving this and really hope to do this in the future.
Thanks for writing Nadia! I hope you do it! It is completely manageable — and should you happen to be local I would be happy to help you out!
I am getting ready to do this with my kids this summer. I have never done it before so it is new to me too. I got an incubator, one that does not turn, but we will be ok. Great article and I might co,e back for more help later.
Oh good luck! I hope you have great success. Please let me know if I can answer any questions along the way.
Hello Sarah! I found your blog about chicken hatching as I am looking for ideas to do a children’s program hatching eggs at our library. You mentioned, “In the next post I will talk about activities to do with the eggs while they are in the incubator, and about candling the eggs to find out which eggs are developing. ” I could not find that post. Can you provide a link? Thanks much for your great blog and inspiration! Paige
Hi Paige,
Ahh! You caught me! I don’t believe I actually took that post out of my head and into this space. We hatch each and every year though, so this year I will be sure to get some posts out about it. In the meantime, you are most welcome to email me at HowWeeLearn@gmail.com and I am happy to help! I am so excited you are considering this – it is really absolutely magical!