Christmas celebrations are in full swing over here. The Christmas trees are up and decorated, the lights hung, and Santas’ and Snowmen are displayed as far as the eye can see. So it’s only fitting we break out the green painter’s tape!
Before we get into my love of painter’s tape …I mean, the Christmas activity… be sure to get your FREE Sample from Christmas School! It includes the topic all about reindeer and some beautiful watercolor vocabulary cards as well. Grab the sample below, and if you love it—which I know you will!—you can get the full version right here: https://shop.howweelearn.com/products/christmas-school
Back to the painter’s tape. I mean, Christmas tree activity…
As you may know, we (I) have a love of painter’s tape in this house. I have written about 7 ways to learn numbers with painter’s tape, we have done some mazes to learn letters, too many art activities to list, and you have likely seen painter’s tape on our floor in various posts that are not actually about that painter’s tape. Because there is always painter’s tape on our floor. Because it is AMAZING.
Actually, a friend of mine loves painter’s tape even more than I do. I sent her a picture of this activity and told her it really should be going on her site, Hands on as we Grow, since she is the true Painter’s Tape Queen. She kindly replied there was no need, as she was planning almost the exact same activity with her little ones! Oh, great minds… great sticky minds…
This is a special Christmas Edition painter tape post—perfect for adding a little Christmas fun to any day!
I started by quickly making 2 Christmas tree shapes out of painter’s tape on the floor.
Two? Yes, the boys are in THAT phase.

Quickly? Yes, the boys are also in that phase.
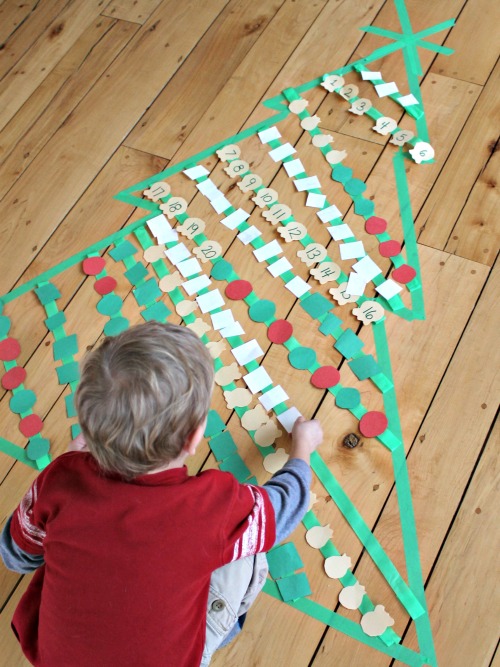
Once the Christmas tree shapes were on the ground, we made some ornaments. We cut some red and green circles out of construction paper so we could do some patterning on our tree.
Then, I cut some popcorn-like shapes (which Sammy thought were teeth) out of white construction paper. I added the numbers 1-20 on them so Sam could practice ordering his numbers while “stringing a popcorn garland.”
I placed painter’s tape, sticky side up, across the Christmas tree (I wanted it to sort of look like garland). It worked best to place only one piece of tape on at a time, otherwise, feet and bodies would get caught on the other sticky pieces.

Sam started with his popcorn garland, and added his numbered popcorn to his tree. When he finished the first strand of tape, I would add another underneath.
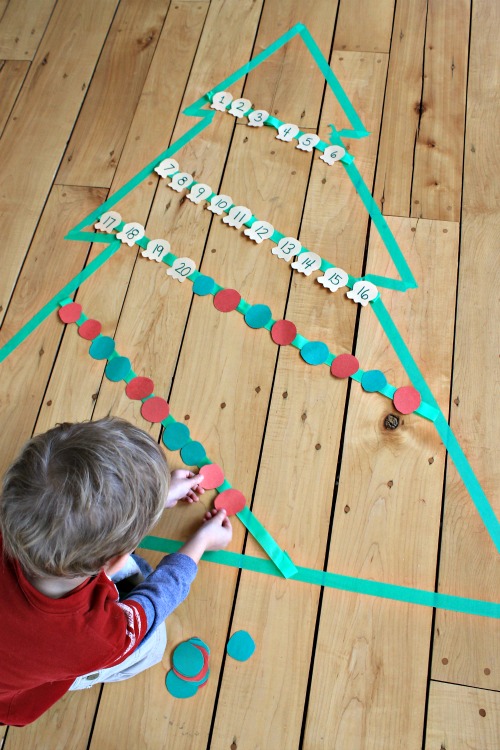
When he finished his numbers, he did some patterning. Once he had used all his ornaments, he went to make more, and I would continue to add tape whenever he asked me to. Boy, did that tree get full!
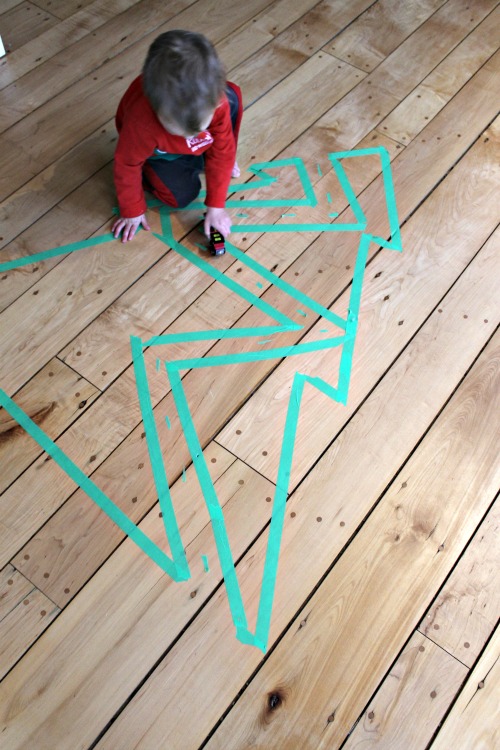
Benjamin, at 2 years old, was not really into this activity. He kept getting caught in the tape. I tried adding tape to his ornaments individually and letting him stick them on his tree shape, but he wasn’t really into it.
So I ended up creating a road through his Christmas tree—and that was a big hit. Of course it was… painter’s tape is AMAZING.
Almost as amazing as contact paper… but that is for another day.
Thank you for reading! Please consider liking us on Facebook and joining our over 100 000 followers on Pinterest! Thank you!

I love all the counting and patterning! AND the road! That would be a big hit here too. Don’t you love that you can just rip up painter’s tape and move it around to change it to be whatever you need at the moment?!
Spoken as a true Painter’s Tape Queen! And yes, I truly do love that painters tape is SO versatile and easy to change!
This is so creative and fun!