I had been thinking about making a DIY light table for years. Literally years. I am not sure why I wasn’t making it, really – they look so cool – and I found some super easy tutorials online too.
But for years we remained a light table-less family. Sigh. Those poor deprived kiddos of mine.
Last year Sammy had a light table in his kindergarten room, but wasn’t really drawn to it. So my light table dreams were pushed aside a little more.
But this year, Benjamin has one in his preschool room and is drawn to it like a moth!
THAT was just the push I needed to finally make one. The knowledge that it would actually be used.
So I made one -and it is! All the time! And it took me …. 10 minutes to make.
I’m not kidding.
(Contains affiliate links, thank you)
YEARS of contemplating — tons of time dreaming about the activities we could do — and it all took a grand total of 10 minutes. Also about $15.00

I read quite a few tutorials over the years:
And Next Comes L has SO many cool activities to do on the light table, and a great tutorial – but I wanted super simple
Tinkerlab’s tutorial was really good, but I did a little modifying.
In the end, I am thrilled with how our Light Table turned out. Super easy, super inexpensive, and it couldn’t work better.
Here is how I made my Light Table:
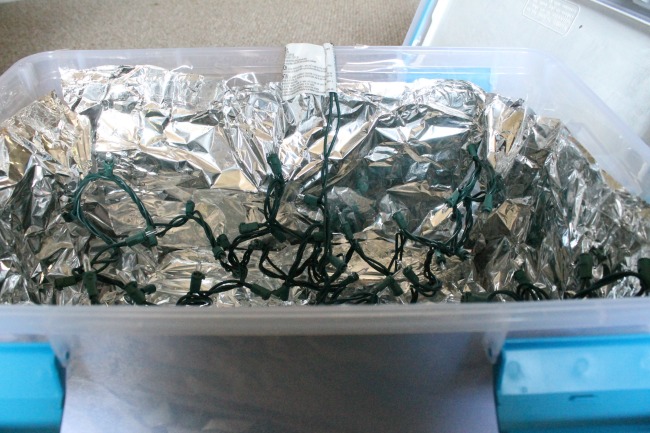
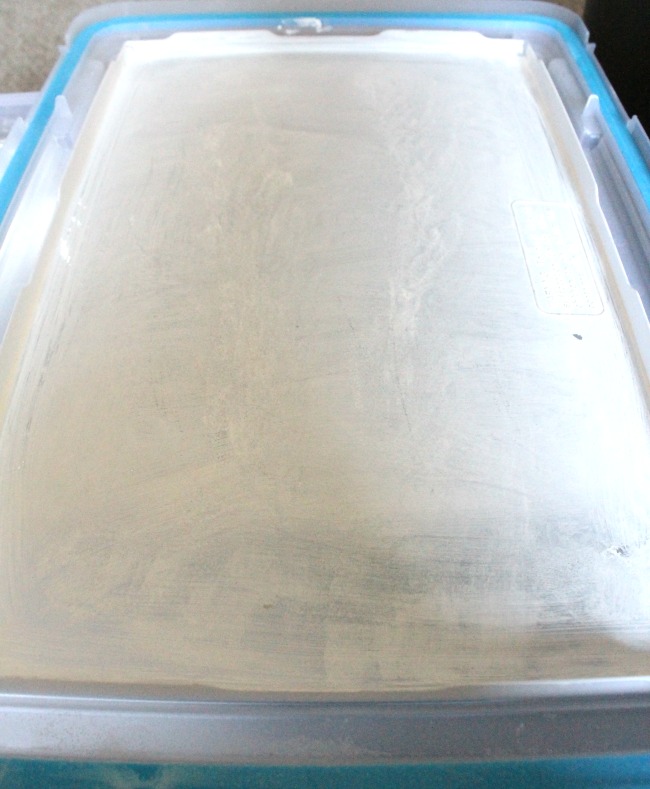
I ended up buying a clear Rubbermaid container with a clear lid. This was in fact the only purchase I made – hence the $15 cost.
Next, I lined the interior of the container with tin foil – the bottom and the sides, and secured with clear packing tape. I actually used the Gorilla Tape (which is my new go-to for anything tough to secure).
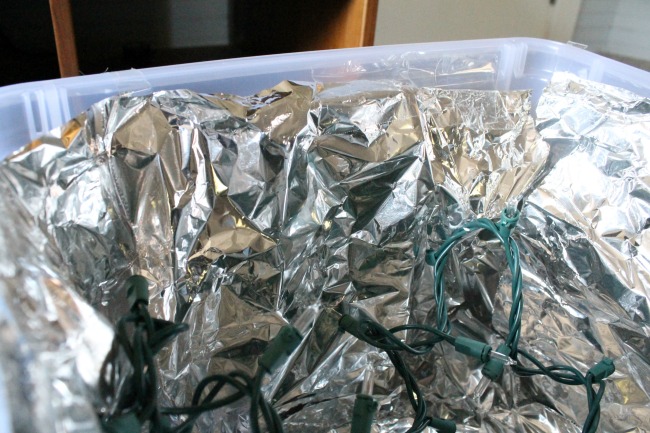
After, I taped a strand of Christmas lights all around the middle of the Rubbermaid container like a spider web, and secured it with that Gorilla Tape.
Finally, I painted the underside of the lid with a thin coat of white acrylic paint. This was to diffuse the light evenly.
And that was it! Works brilliantly.
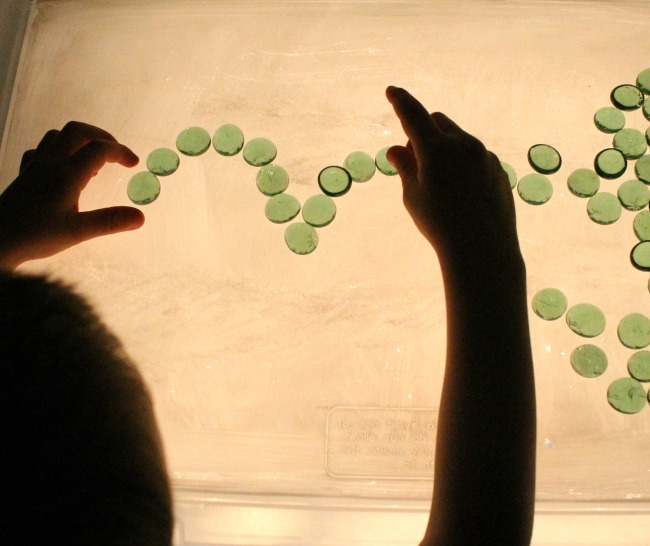
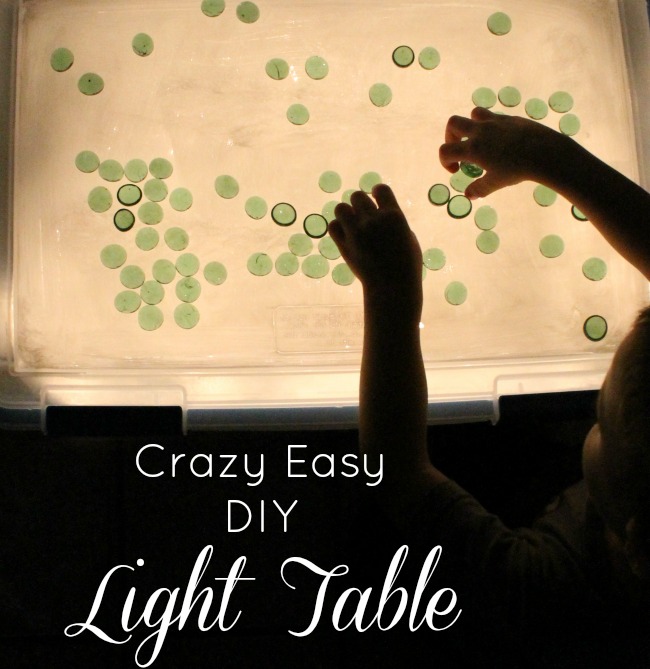
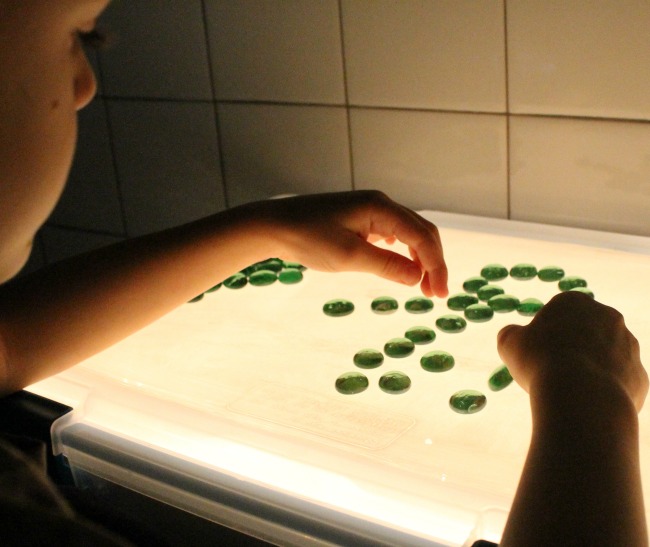
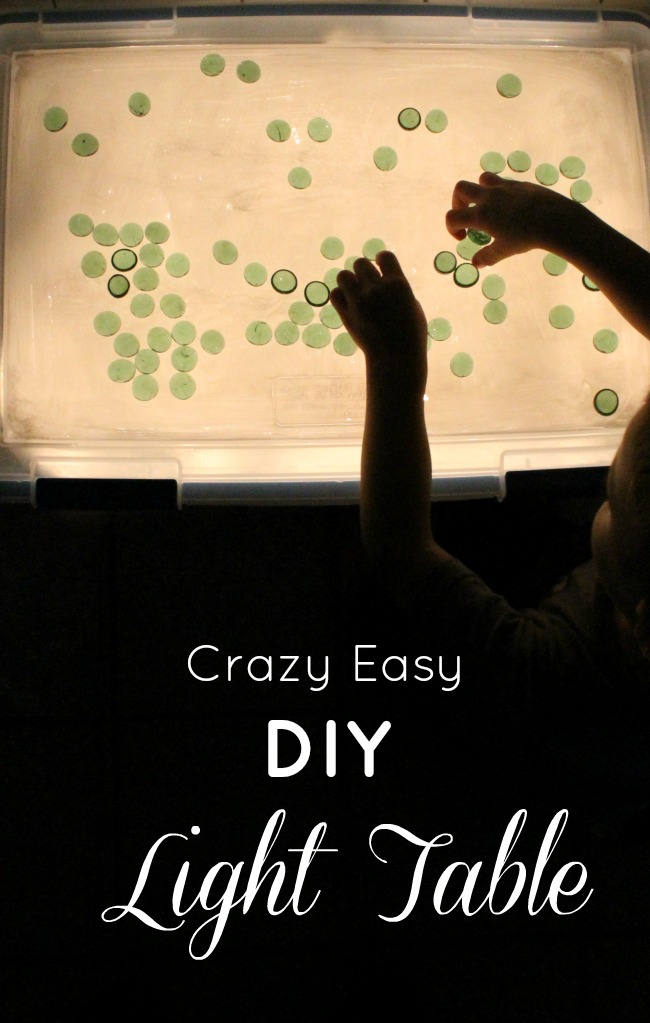
We have been using small glass jewels from the dollarstore for lots of loose parts play lately.
I also found some file folders that were made of that thin, see-through coloured plastic and cut out various shapes. These work great for building pictures and doing some colour blending.
I am so happy with the results, and even more happy that my little Ben is drawn to it. Lots of calming, quiet play is heading our way.
So give it a try and tell me what you think! Or think about it, contemplate it, and then come back to me in a few years …. I feel ya friend.
Thank you so much for reading – see you soon!!

Fantastic ideas… thank you!!
Thank you very much Di – and you are most welcome.
Did you cut a hole through the plastic container to connect the Christmas lights to an electrical outlet?
HI Jin, Our plastic container was only sealed on the short ends and rather loose on the two long ends, so the cord could easily stick out one side without getting squished. You could cut a hole though if you had a tighter fitting lid.
Very cool! Just wondering, does the foil help reflect the lights? Or could I just paint the inside black?
Hi Christina, great question. You are right, the foil is to help the light reflect so would give you a better result than just painting it black. Have fun!
I want to make one for my classroom. Does the room have to be dark for it to work?
It is definitely better if the room is dark Paula, but not necessary.
Hi!
Was wondering if you could just use white copy paper on the underside of the lid instead of spray painting? The paper seems like it would be thin enough to diffuse the light.
This is a great question. I have not tried doing this myself, but it sounds as though it would work. If you try it out, please come back to let us know!