John and I had some time to ourselves this weekend. All of the kids went for a sleepover to Nana and Papa’s house, so John and I let loose and went…
Antique and Flea Market Shopping!
Yep.
And it was fantastic. We sauntered along for hours looking at neat things, pondering where we could put things in our farmhouse, or out in our garden. For the most part, we just looked (I know, just when you thought Flea Market shopping couldn’t get any more exciting, I removed the shopping part…)
But we did get a few neat things. Lots of baskets for organizing, and some little things here and there. My favourite find though, were these wooden embroidery hoops.
A couple of years ago I was teaching Madeline to cross-stitch and I could not find these embroidery hoops anywhere. I was told they no longer made them. That made cross-stitching much trickier.
So when I found a big pile of these I swooped up just as many as I could carry. And paid a grand total of $4 as well.
But as soon as I saw those pretty wooden hoops, I knew that four of them would not see any cross-stitching. (Well, truthfully the others likely won’t either, she doesn’t like it one bit due to the lack of hoop when she was taught. Or due to the fact that she is all grown up and cross-stitching is not the number one thing on her to-do list these days). But anyways, four of them would be put to another use.
Okay, a quick pause from my riveting story on antiquing! Have you downloaded your FREE Crafting a Bond mini ebook? It has some lovely “together” crafts for you to share with your little one, including another fall-themed craft I think you’ll love! Grab your copy right here:
This summer, I have been cleaning, organizing, and de-cluttering our playroom. It seems the toys multiply overnight down there. We parted with a good 50% of things again, and what always surprises me is how much more the boys love playing down there with the fewer toys.
Now with a nice, clear, minimal feel in that huge space, I can focus on the fun details of decorating. We have a huge sliding glass door with floor-to-ceiling windows on either side. Those windows were just begging for some sort of beautiful something to be hung in them. I knew that these wooden hoops would look gorgeous as sun catchers, and they do.
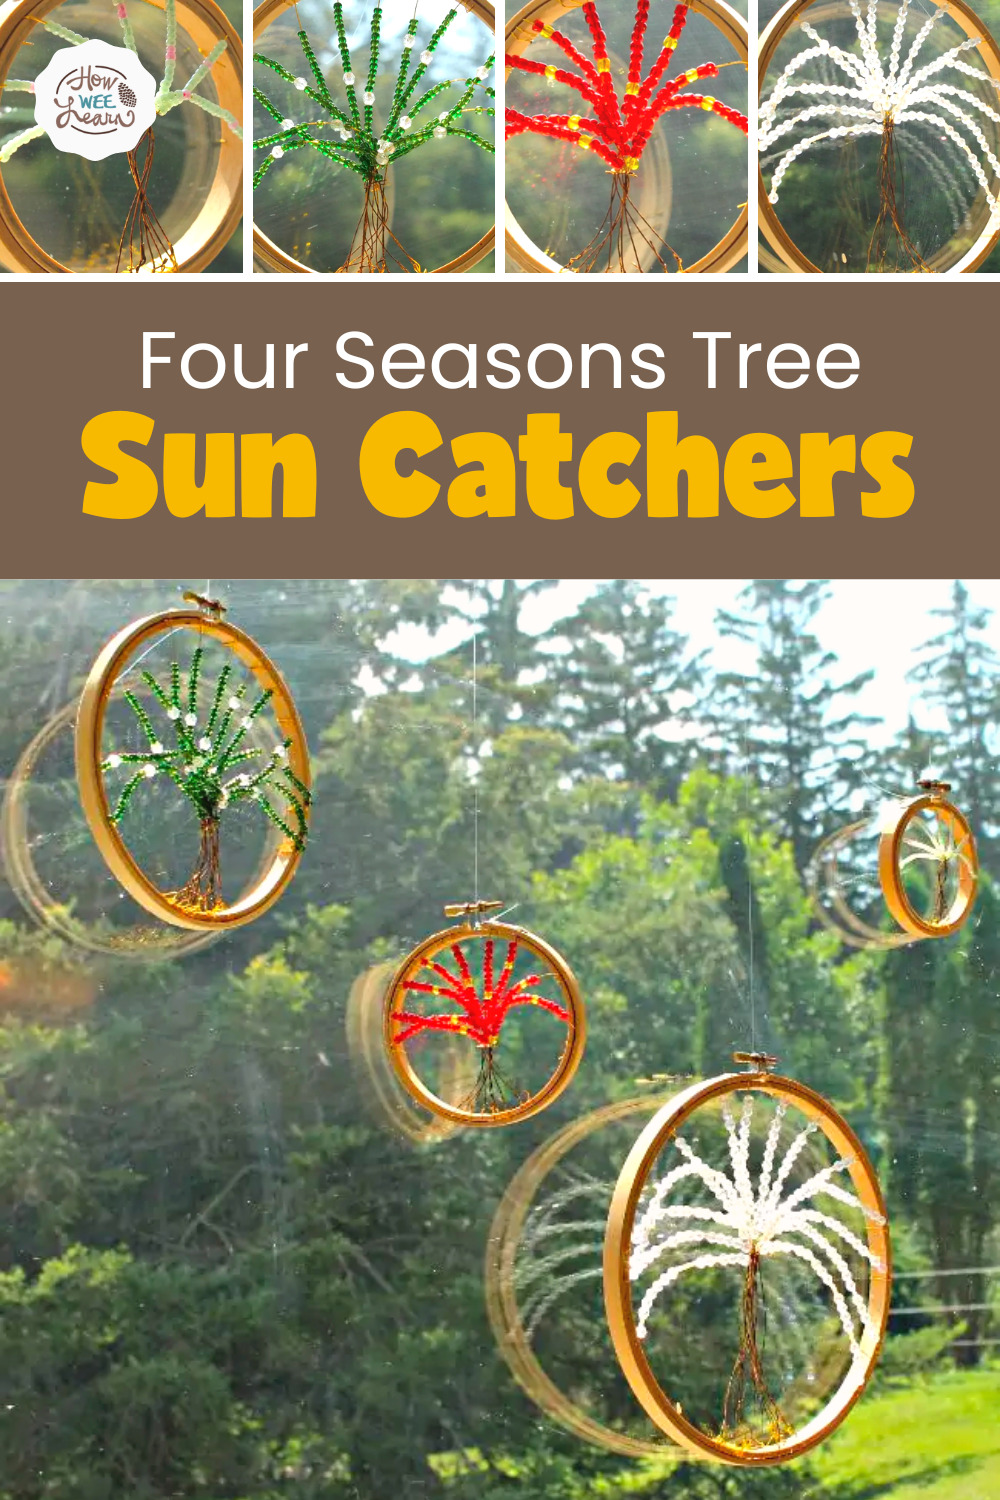
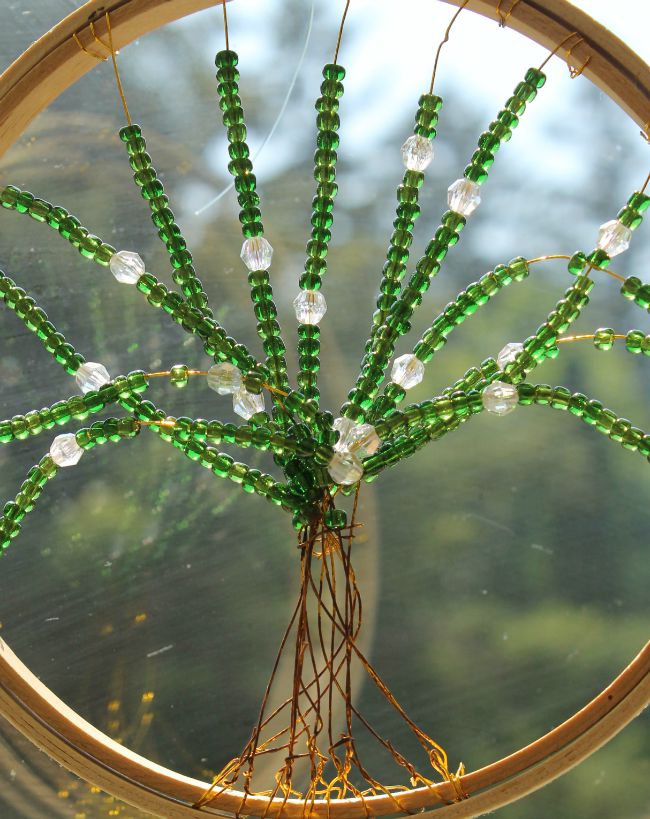
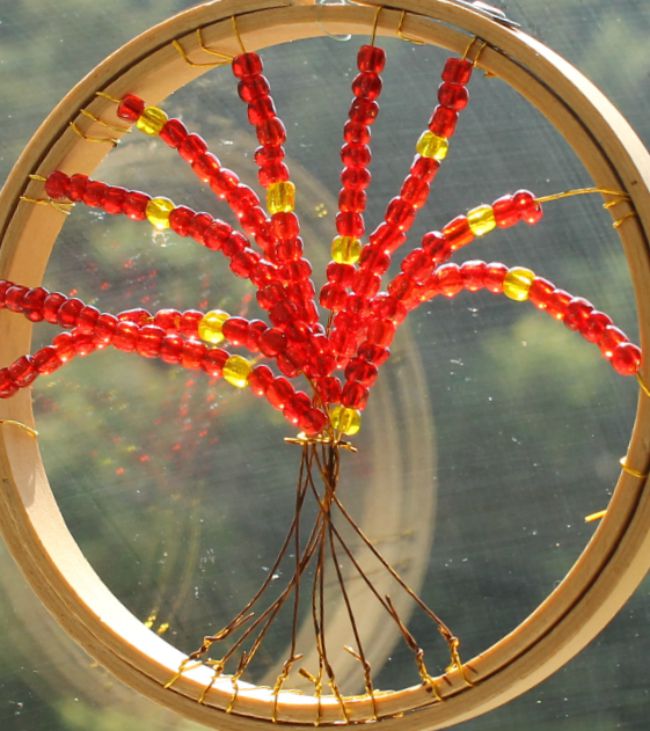
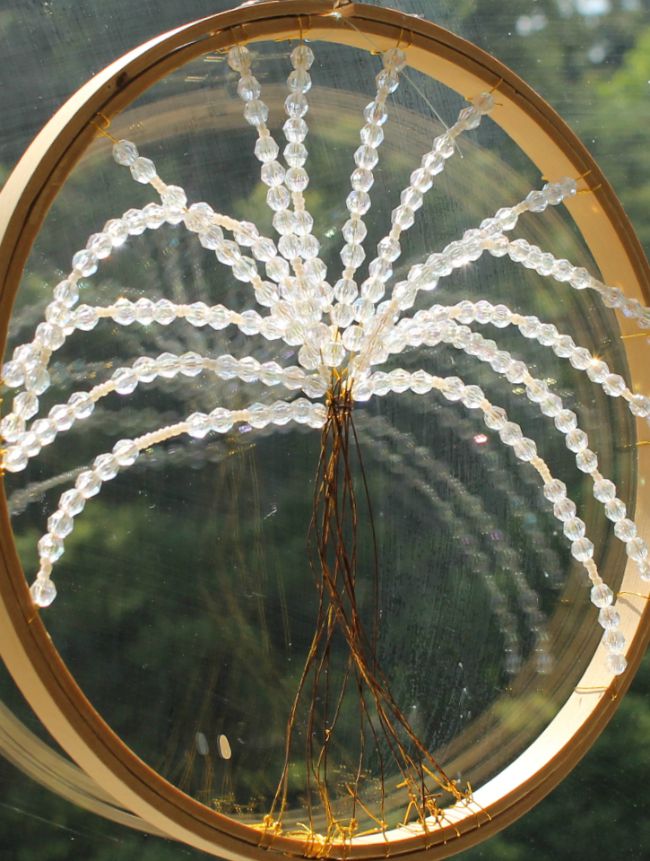
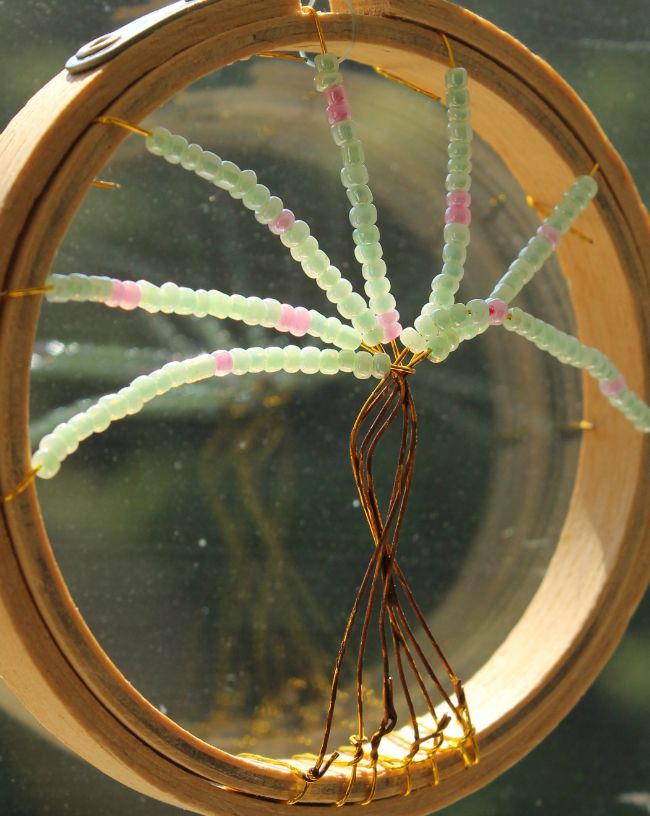
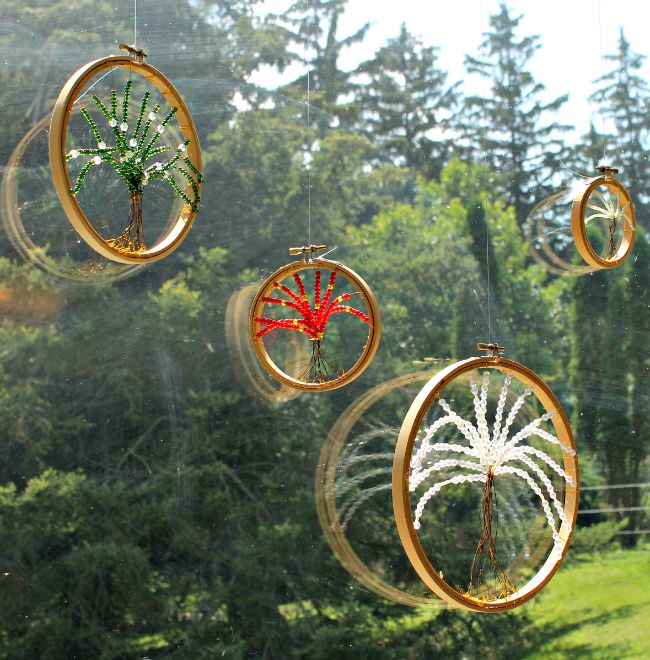
I decided to make Four Seasons Tree Sun Catchers. One for each season. They were fun to make, and the pictures definitely do not do them justice!
How to Make Beaded Suncatchers
For these sun catchers, I used the wooden embroidery hoops, jewellery wire (from the Dollar Store), and coloured glass beads.
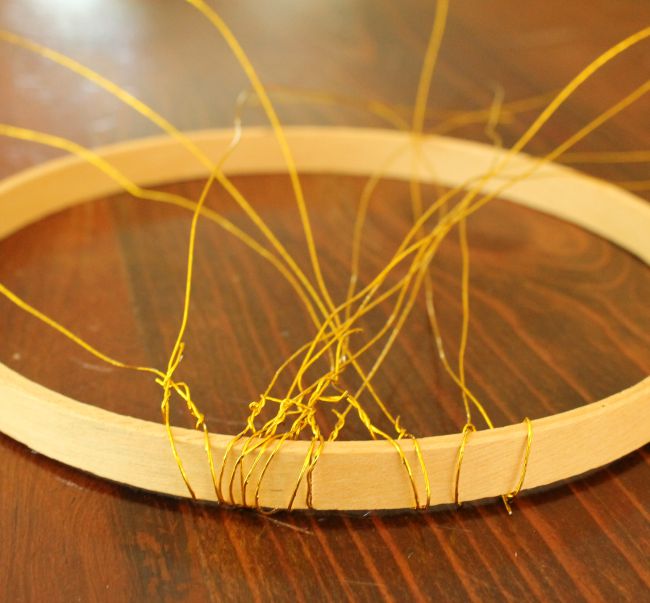
I began by separating the inside hoop from the outside. I took the first inside hoop and measured the jewellery wire from one side of the hoop to the other. I added about an inch of extra length on either side of the hoop and cut it. I then used that to measure and cut 12 other pieces of wire. I wrapped each piece around the bottom of the embroidery hoop.
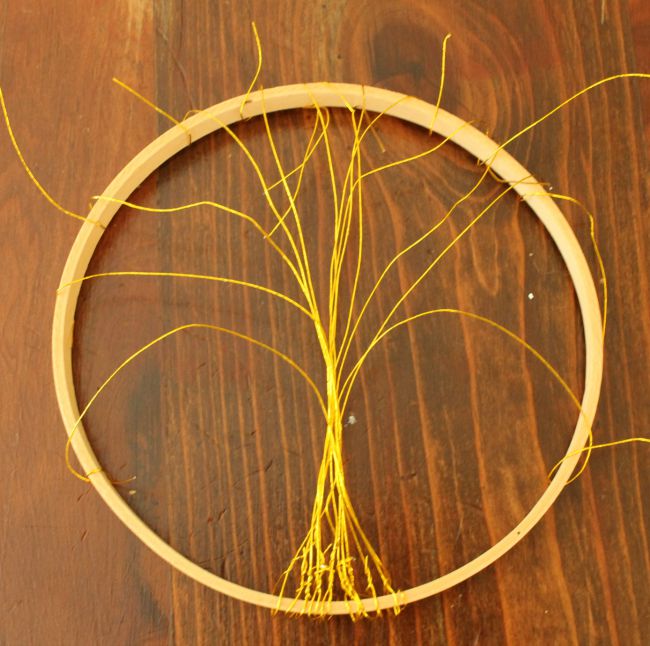
Next, I gently and loosely twisted the wires together to form the trunk. And then I arranged the remaining wire to look like branches.
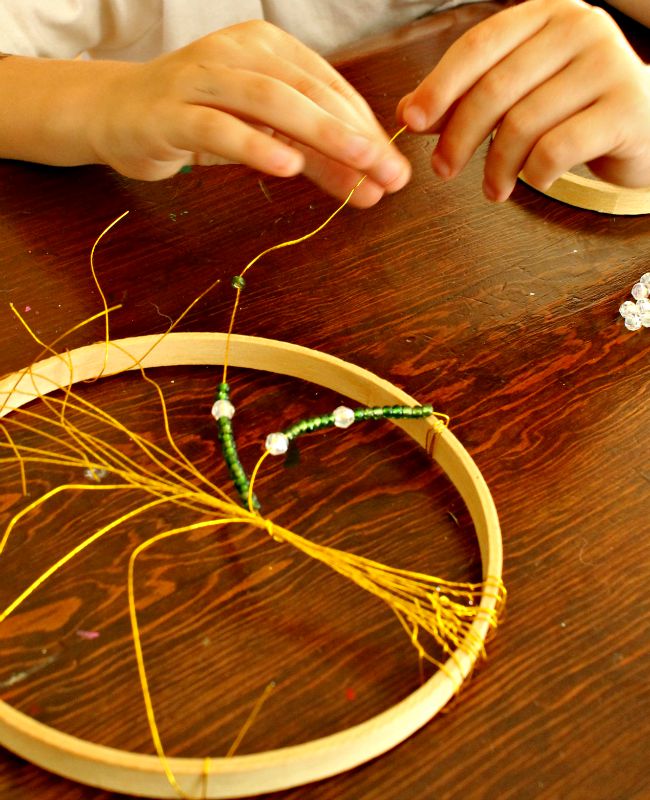
Once I was happy with the arrangement, I took one small piece of wire and wrapped it around the top of the trunk (so the beads would stay on the branches) and then I thread the beads onto the branches.
I did have a little helper here and there, but for the most part, this was a Mama craft.
I used green glass beads for the summer tree (I added a few extra sparkly white ones as well).
I used red glass beads with a few yellow beads for the fall tree.
Gorgeous white sparkly beads were used for the winter tree.
And pale green and pale pink glass beads were used for the spring blossoming tree.
Once the beads were threaded onto one branch, I would secure it to the outer edge of the hoop by wrapping the wire around a time or two. Then I would start on the next branch.
For the biggest embroidery hoop, I used 17 wires, and for the smallest hoop, I used 7. Once everything was beaded and wrapped, I put the outside ring on the embroidery hoop and attached some fishing line.
I may or may not have gone down to the fishing poles and snipped some line… This is really quite an inconsiderate thing to do to my dear husband, but I was very excited to see how they would look in the window. And they looked stunning! So I know he will understand (or at the very least be used to it).
I was so happy with how they turned out. They add a very pretty, colourful touch to our natural play space. A space I will share with you soon!
Thank you for reading friends, hope you are having a lovely week.
xo
Sarah
P.S. Don’t forget to grab your FREE Crafting a Bond mini ebook!

These are beautiful and would be fun to do with my granddaughters! Are there printable instructions?
Hi Jean, thank you so very much. These little trees would make a lovely Grandma/Granddaughter craft! I am afraid I didn’t make printable instructions. Hopefully you can read along on the computer okay. Once you start it is really quite straight forward (I hope!) Thank you for reading!
I THINK THESE ARE AWESOME!!! ALWAYS LOOKING FOR SOMETHING TO KEEP ME BUSY. THANKS,I CAN’T WAIT TO TRY ONE…
Wow these are so beautiful. I’m 69 and retired and love to do bead work to pass the time. I make things and give them to my friends.❤️