Alright – I told you I would post twice last week – I may have even used the ‘p’ word … but I didn’t. We had another bad storm which made me unplug for a couple of days. I do apologize, it seems best for me to not make promises about how often I will be in this space right now. I truly hope to be here twice a week sharing ideas with you. Truly. But, I will at the very least be here once a week. I promise (there I go again).
A few days ago I posted a picture of these sandpaper letters I was in the process of making for my little ones. I asked your opinion on whether or not to paint them – and boy was that an informative post! I had no idea that our Facebook community was so knowledgeable about tactile learning! But let me start at the beginning.
We have been working on the alphabet at home everyday. I am focusing on capital letters first with my Sam (who is 4). At this point he knows the names and is able to recognize all of his capital letters. We have worked on these slowly over quite a long period of time. Feeling confident that he was ready, I began introducing lower case letters. This is how I usually do things, at least I have for the past 5 years of teaching.
But as soon as I began this with my Sammy confusion set in. He was mixing up letters, even the capital letters he knew so well, and starting to get frustrated. So we aborted that mission – at least for awhile. After all, if kids don’t learn as we teach, perhaps we should teach as they learn, right? Instead I decided to re-focus on the capital letters. This time, I thought I would try to introduce the letter sounds. And it is working MUCH better.
It seems my Sam is a visual, tactile, and kinesthetic learner. He learns by seeing and feeling and doing things. So by me changing the look of the letters completely but telling him they had the same sounds as the big letters it confused him greatly. But by keeping the same visual look of the letters and just changing the sound they make he seems to be doing much better. I thought I would help him along this path by adding in a tactile experience.
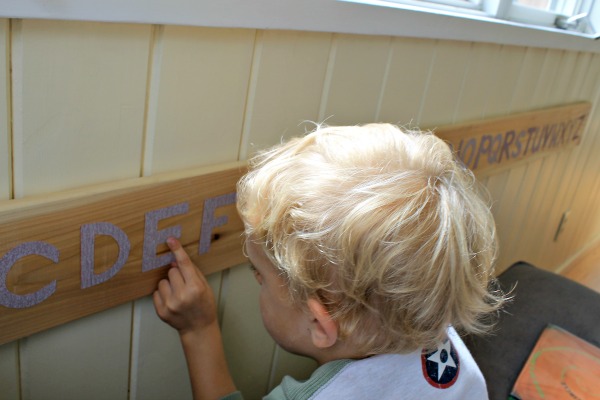
Since we have been only looking at letters or drawing them as we have been learning their names I wanted a different way to get the letter sounds into my Sam. So I decided I would introduce the letter sounds with tactile letters – letters he could touch and feel the shape of.
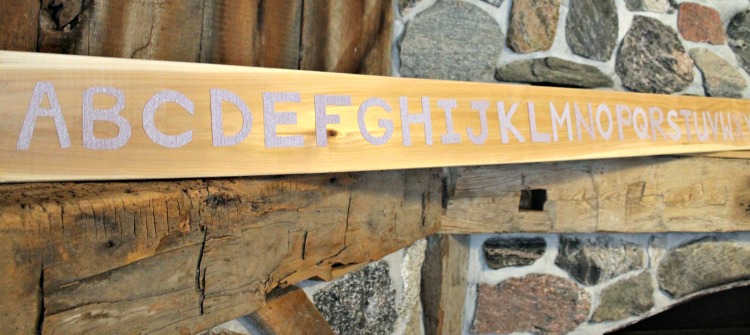
I had a similar set of sandpaper alphabet letters in my Kindergarten classroom when I was teaching. And they are very simple to make – quite versatile too – so I decided to make a set for home.
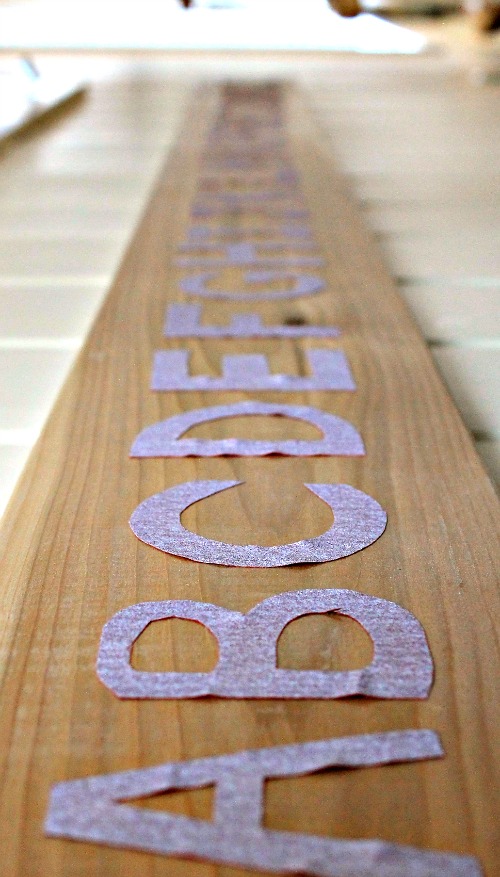
Very simply I found a long piece of wood that we had in the workshop and claimed it for my own. You’ve got to be quick around our place – everyone is always building something. Then I found some very fine sandpaper. I used two pieces of sandpaper.
I cut the sandpaper into small rectangles of the same size. I cut each piece of my sandpaper into 4 strips, and then each strip into 4 again. This left me with 32 rectangles. Lots of extra for “just in case I mess up” pieces. Because if I didn’t have extras I would mess up. Since I did have extras of course, I didn’t.
Then I used scissors and cut out each letter. I don’t really have trouble doing tasks like this. My hubby does. He informed me he would need to print off letters, trace them onto the sandpaper, and then cut them out. So basically I am better than him. 🙂 Of course both ways get the job done, and truth be told his way likely would have looked much better. That’s just not how I roll.
Then I placed the letters on the wood and looked at them for about 30 minutes. I couldn’t decide if I should paint the wood first. Or stain it. Or somehow paint the sandpaper. Or just the vowels. Or …. you see where I am going.
So I did what most people in my situation would do, and posed the question to my lovely Facebook community. Low and behold I had so many fantastic suggestions and ideas that I became even more confused. I would read an idea and decide, “oh that’s brilliant, of course I will do it that way!”. Then I would read the next comment and say, “well, that is very fascinating, I think I may do it that way.” and so on. Eventually I became exhausted by all the brilliant minds on Facebook and went to bed. It was at this point (about an hour and a half after I finished cutting out the letters) that my hubby stated he would have been done by now – even with all the added cutting and tracing – because he doesn’t use Facebook. So, I suppose based on my previous knowledge, he is better.
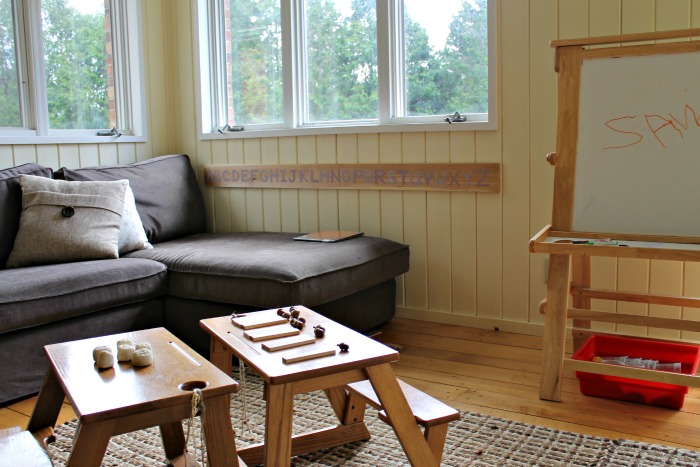
The next morning I woke up confident. I knew just what to do. I opted to leave the letters and wood natural. Since the entire point of this project was to give my Sam a tactile experience I didn’t want him to be distracted by his other senses. Plus, this board was going up in our quiet area in the family room. With loads of natural wood, so it would look lovely as it was. And it does.
We have only used this board a few times, but so far I am very happy with how it seems to be working for Sam. He seems to be learning the sounds easily and (most importantly) with no frustration.
And so we will leave the lower case letters for some time. There is no rush of course. All in his own time.
Please consider liking us on Facebook so we can share more creative learning ideas with you and your little ones! Thank you.

Such a cool idea! I would love to hear any ideas you have for sight word practice! My 1st grader is really having a hard time memorizing his sight words.
Hi Shelly! Glad you like the sandpaper letters! Perhaps you could use the sandpaper letters to do sight words? Your child could trace the letters of the sight words? Rainbow writing was also a hit with my daughter – you write the sight word in one color, and then trace over top of it in another color, and then another and so on making a rainbow. Good luck with those sight words!
This would be very helpful to my son too. And I think he’d love that the letters are made from sandpaper. Great idea!!
Thank you Ann!
Thank you Ann
A lovely idea! I’m sure my boy would love these letters too!
Thanks Anna
How did you adhere the sandpaper letters to the wood? Thanks!
Hi Marri! Thanks for your question – that is an important step I forgot! I used wood glue with a paintbrush. I brushed on a thin coat being sure to get all the edges and the corners to avoid any little fingers picking them off.
I am so going to use this idea. My boy is only 18 months but he loves texture and is fascinated with numbers at the moment. So I will do a 1-10 numbers board with sandpaper . Makes real sense to have the tactile reinforcement to the shape and sound. Great tool.
I love the idea of using this for numbers and adapting it to your little ones interests Jennie! Glad you found the idea useful – and thank you so much for taking the time to let me know.
These look like a beautiful addition to your home. I love how it invites kids to experience the alphabet with the sense of touch!
Thank you Clarissa. So glad you enjoyed the post! It’s always great to bring in as many of the senses as possible when teaching little ones. Thank you for taking the time to comment!