Sometimes it is fabulous to have a trick or two up your sleeve for when you need a quick craft or activity to save the day. My ULTIMATE, Easy, No Cook Playdough Recipe is definitely one trick that needs to be up there friends. Five minutes to make, and lasts for 6 months! I am not over selling it — this playdough recipe is awesome.
It is no secret that we are big into quiet time activities around here. Whenever my little ones get over the top excited, or ideally just before this happens, we try to do some activities to help keep them grounded (as in feet on the ground instead of my couches and tables).
Most of those activities come, of course, from our magical and oh so simple Quiet Bins! (I really don’t know what we did before quiet bins.)
One quiet time activity that has been making an appearance in one fashion or another is the good old playdough. Whether we are making a candy cane factory, decorating Christmas trees, or doing some construction, playdough has been fabulous to help my little ones settle down just for awhile.
Well, there is more to love about this playdough recipe than simply … well … the awesome playdough that results.
“More?!?!” You gasp? (You did gasp in astonishment, right?)
Yes! More! This playdough recipe is so easy to make, the making of the playdough is actually a brilliant activity for children in itself!
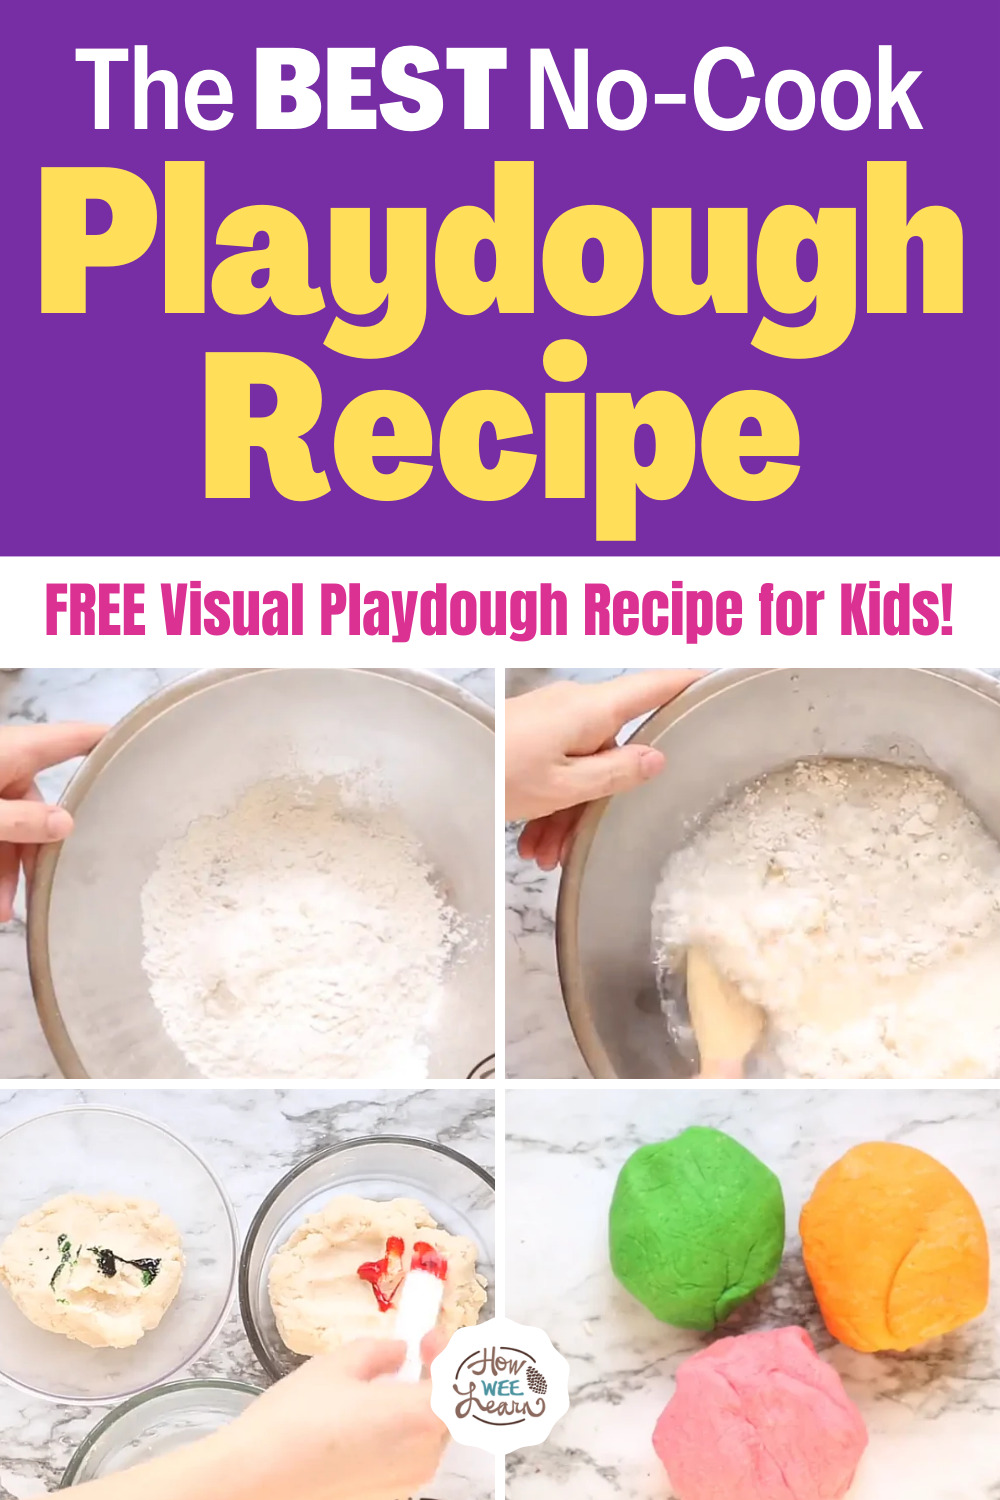
This FREE Visual Playdough Recipe is a visual recipe, perfect for children. Now they can really take the lead with making playdough!
So print off that visual recipe for your little one, and let’s dive into this no cooking required playdough recipe. I bring you my Kindergarten Teacher No Bake Playdough Recipe. Hope you love it!

(may contain affiliate links for your convenience)
As a Kindergarten teacher you learn a few things. Along with how to find missing mittens, boots, and teeth as quick as lightening, you learn to make a mean batch of Playdough.
[mv_video doNotAutoplayNorOptimizePlacement=”false” doNotOptimizePlacement=”true” jsonLd=”true” key=”sn6nxrlcdt0tufk9o4wu” ratio=”16:9″ thumbnail=”https://mediavine-res.cloudinary.com/video/upload/sn6nxrlcdt0tufk9o4wu.jpg” title=”The No-Cook ULTIMATE Playdough Recipe” volume=”70″]
While I am now home almost completely with my own little ones, that playdough recipe is still used often. This is the EASIEST no cook playdough recipe around. And I argue it is also the very best playdough recipe too.
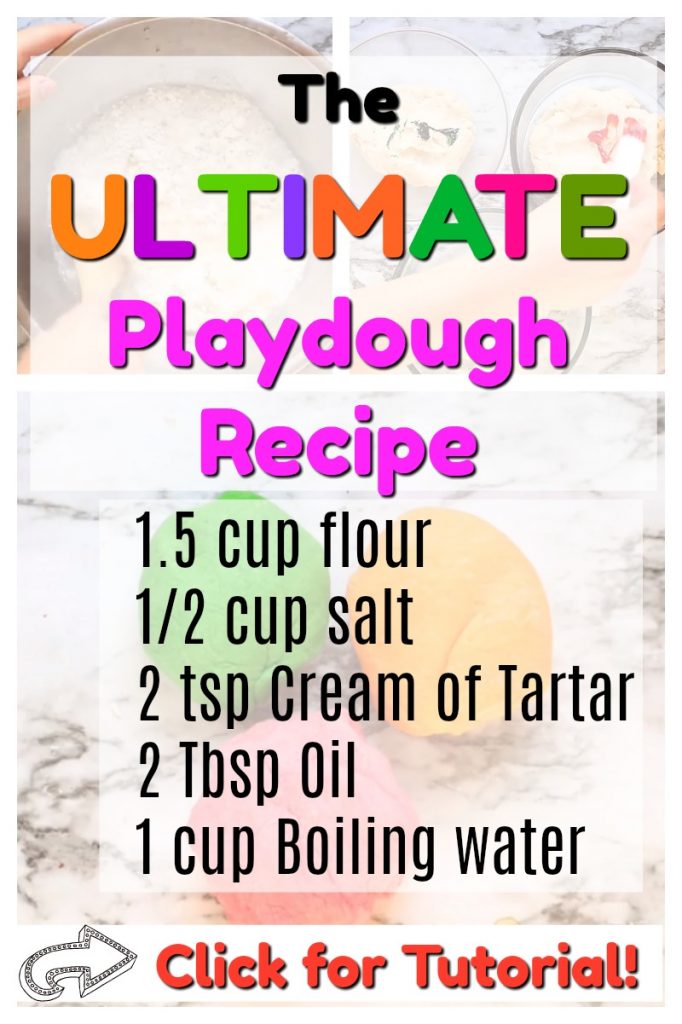
The Ultimate No-Cook Kindergarten Teacher Playdough Recipe
Ingredients
- 1.5 cups flour
- 1/2 cup salt
- 2 teaspoons cream of tartar
- 2 tablespoons oil
- 1 cup of boiling water
Directions
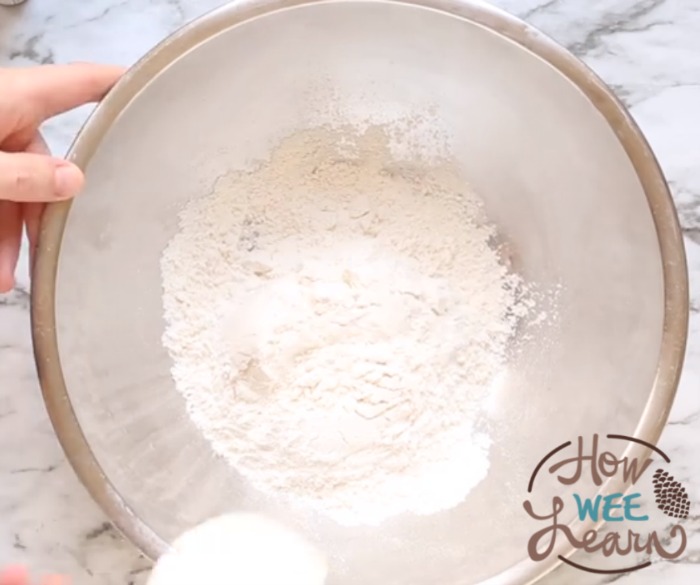
Dump all the dry ingredients into the bowl and mix it all together.
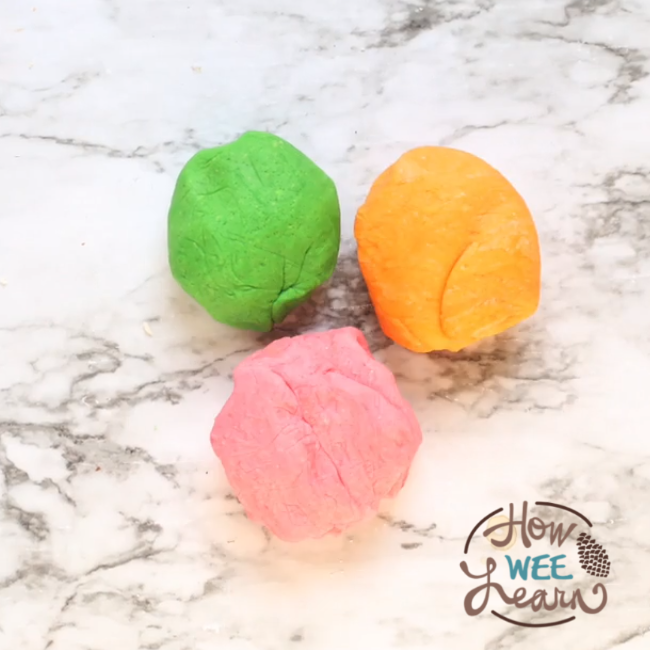
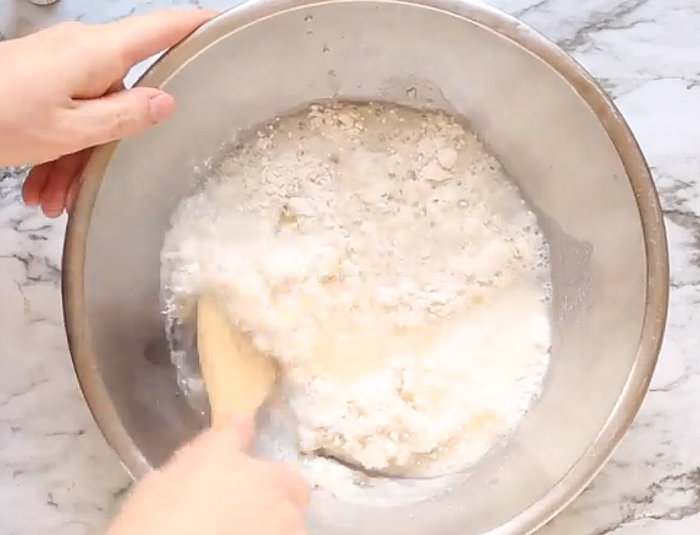
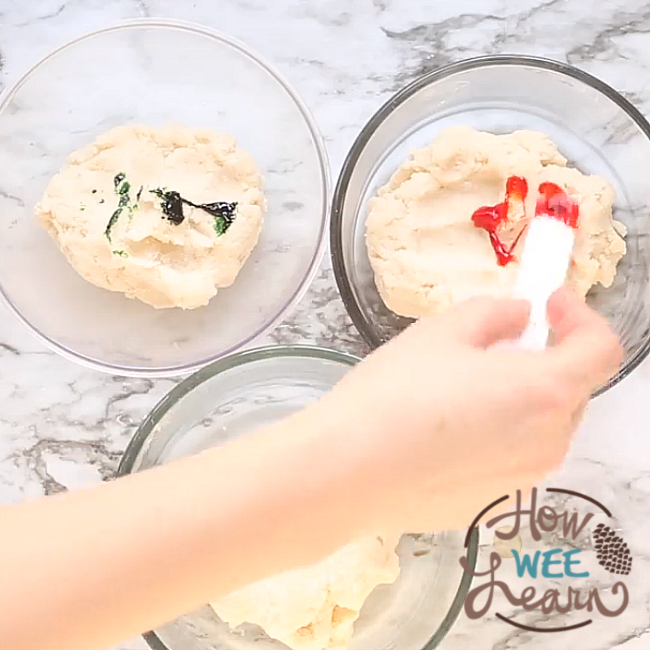
Then add in the boiling water, oil and stir. You can add the food colouring directly to the boiling water if you prefer for nice, easy colour mixing.
Or if you want different colours, you can add the food colouring at the end into the divided playdough.
Knead a few times and it will become perfectly smooth. And I do mean perfectly smooth. Not only is this playdough just about as easy as possible to make and completely impossible to ruin, but it is also so, dreamily silky smooth.
I love this particular playdough recipe as even very little ones can help in almost the whole recipe. The order of ingredients doesn’t matter at all—just pop it all into a bowl and stir it up!
PLUS you can’t mess it up! Too sticky? Add more flour. Too clumpy? Add more boiled water.
You can mix in some essential oils if you have any, vanilla, or cinnamon. A fellow Mama who reads my blog made this recipe with coconut flour as a gluten-free option. You truly can’t go wrong!
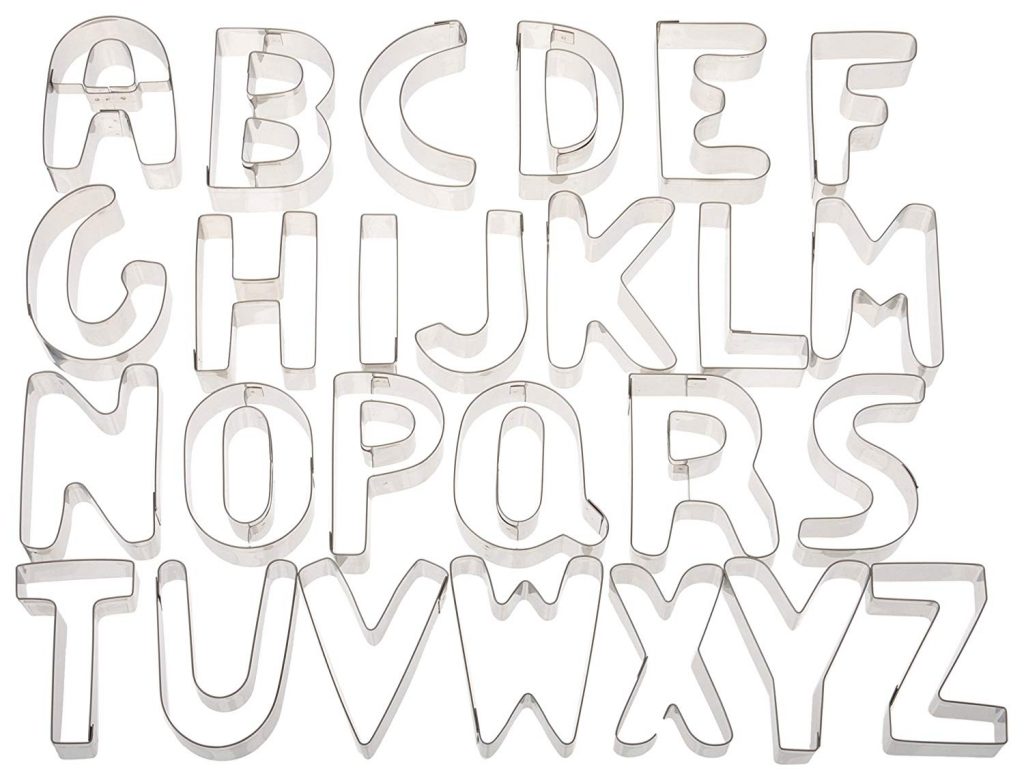
Playdough is fabulous for strengthening little hands for future writing. It is also a great way to play with letters! This is our favourite cookie cutter set to use with playdough {I am an Amazon consult and will receive a small commission if purchased, at no extra cost to you}.
And if you are looking for some inspiration with ideas for exactly what to do with this simple playdough, check out all of these awesome Playdough Activities!
I hope this playdough recipe is just the trick that you have been needing up your sleeve! Perfect for a rainy day, sunny day, ANY day!
Thank you so much for reading,
xo
Sarah


Thank ypu for your playdough recipe, i had lost mine and couldnt remember the quantaties. Have an awesome year teaching.x
Thank you Kathy!
We just made this and it’s great! Only had one tsp of cream of tartar so I looked up substitutions and it said to use lemon juice. It’s great playdough. My preschooler loves it !!!
Awesome – I always seem to run out of cream of tartar, so a substitute is just what I need! Thanks Amy!
Where do we add the oil? I couldnt find that part anywhere ! Lol
Hi Carolyn, you can add the oil anytime at all! Just dump it all into the bowl and stir – dry ingredients, wet ingredients, doesn’t matter one bit.
Awesome!! I just made it tonight to test for class this week! It is effortless and works so so well i cant believe it! Thank you so so so much
WooHoo! So glad you love it.
I am wondering how much one batch makes. I have 18 students. Any suggestions?
Hi Franci! One batch makes about 3 cups of playdough. For 18 little ones, you may want to make a triple!
This is the BEST, easiest recipe EVER! I make it all the time for my 2 yr old granddaughter. It’s keeps forever, stays fresh in a zip lock bag!
WooHoo! Thank you Heather!
How long will this last? I want to make it for a birthday party that is a little less than 2 weeks away
Hi Shelby – this stuff lasts FOREVER! Just wrap it in some plastic wrap or in a plastic ziploc bag with the air squeezed out and it keeps for months!
Does the coloring come off on hands!?
Once the playdough is cool, the colour is set.
Hey there! Definitely gonna try this recipe out. Do you think you could add Koolaid to the boiling water for scent and color?
Hey Sarah – I think that would most certainly work!
Another good way of adding colour and scent is to add jelly crystals or angel delight works well.
Thank you for the tip Clare!
Thanks a million for this recipe.
So glad you like it!
Can the oil be olive oil ?
Yes, absolutely.
Or baby oil… Canola… Coconut… Whatever you have on hand!
I want to make this with my class of 3rd graders. However my school does not have a stove to boil water. Any suggestions? I was thinking about a thermos with warm water.
Perhaps you could boil the water in an electric kettle if you have one? The water does need to be very hot … Or maybe a microwave? Any other ideas friends? Good luck Lindsey!
Hi this is a really cool recipe me and my little brother had a blast!
Hi Hailey – I am so happy to hear. Thank you for taking the time to let me know!
Thank you! I’m so excited to try this very easy recipe!
What are your best tips to store it?
Hi Stephanie, it keeps forever! I just store it in a ziploc baggie. Hope you love it!
Are there any other things you can use instead of cream of tar tar?
It is necessary in this recipe because it is a no cook version, but I know there are other recipes out there that don’t need cream of tartar. Good luck!
In the recipe, it calls for 1.5 cups of flour. How much is .5? Does it matter if it is all purpose or self rising?
Hi Rebecca – thanks for reading. The recipe calls for 1 full cup of flour and 1/2 a cup more. I don’t think the type of flour matters at all. Hope this helps!
This is my favorite play dough recipe! It was really easy to make multiple colors at one time. We just set up multiple bowls, one for each color, and boiled the water in the kettle. We used coconut oil and it worked perfectly.
So happy to have provided a favourite!! It’s my go to as well. Super simple – just the way I like it. Thanks for taking the time to comment Jennifer,
I love the texture of this playdough! My preschoolers love it too. Thanks so much for this recipe.
I’m so happy you and your little ones love it! Thank you for taking the time to let me know Pam.
Just made it…. best playdough recipe ever. My daughter loves it !
Great – so glad you love it!
Hi ! Probably a stupid question… but what is cream of tarter ? Where can I find it ? I guess it’s safe for kids. I would like to make it for my 4 years old class. Thanks !!
Hi Julie, Cream of tartar is sold in the spice section of any grocery store. I hope you have fun with your little ones!!
Okay ! I will go to my grocery store then. Thank you so much.
Hi Sarah ! Just wanted to tell you that I made the playdough this weekend for my classroom and it worked perfect, I even use my Kitchenaid to mix the dough as it was really hot ^^ ! Thanks for the recipe !
Hi Sarah,
I made mine tonight came out perfectly fine, can’t wait to use it with the kids tomorrow in my Dayhome. Thanks for the recipe ?
Wonderful Ruby! I hope they love it – thank you so much for taking the time to comment
Thanks for sharing! This stuff is great! The texture is just perfect, and it doesn’t have that creepy chemical smell that storebought stuff has. I just made a batch of red and blue and can’t wait for my daughter to get up from her nap to see it!!
Yay! So happy you love it as much as I do Faith. I hope your little one does as well. Thank you for taking the time to let me know
Sarah I would like to know if this dough can be used like salt dough for making hand print ornaments? If so, would you bake it or air dry it and does it get hard? Would like to make some ornaments as presents with my 3 year old granddaughter. Thanks….
Hi Peggy. I’m afraid this playdough is not great for that. I would recommend salt dough or baking soda dough for that project. This dough dries kind of crumbly and not so nice.
Ok, thanks a bunch.
My pleasure 🙂
By far the easiest and quickest playdough ever made. It was made and ready for my daughter to play with within 20 minutes. Hours of fun was had.
Yay! So happy it worked well for you – thanks for taking the time to let me know!
Thank you for the recipe. I added dried lavendar and lavendar essential oil and then I boiled down some red cabbage and used the cabbage water to colour the play dough 🙂
I am loving this recipe. Quick question. When do you add in the spices, and how much? I am loving the allspice and nutmeg smell but i added it after the fact and it doesn’t have that pretty color that yours does.
Hi Kaaryn – thank you! When I add spices I do so right when mixing it all together. But you are right – it does affect the colour. Perhaps a dark red or orange would work well with these scents?
I just made his recipe yesterday and I put it in a ziplock bag to store it but was wondering if I should also put it in the fridge so it doesn’t mold. I have had past playdough grow mold. Also, I wanted to put it in tupperware. Would that work too?
Thanks, Rachel
Hi Rachel, I store ours in a ziploc bag and do not refrigerate it. If you did I’m sure it would last even longer! If you wanted to keep it in tupperware you may wish to wrap it in plastic wrap first, though this may not be necessary. Please let me know if you discover it! Thank you,
For some sensitive Skins I cannot use salt. Any idea about substitution?
Great question – I am not sure! Perhaps someone here will have a suggestion?
Love this recipe so so much! I have found while you can you cold water, boiling water works best! I love adding essential oils, and this is a great project for the little ones! I made it with a 4 year old and a 3 year old! Definitely a keeper(:
Thanks Abby! So glad you love it.
If I’d have had this recipe before I would have started making playdough years ago. I absolutely love making it, so quick and easy. Thank you so much.
Woohoo! So glad you love it as much as I do
I have to make orange play doh. Should I mix the colors together first in a separate bowl, then add to dough?
Hi Darlene, you certainly could do that to ensure you get exactly the colour you are after. Good thinking! I always just add a few drops of this and a few drops of that to the dough directly myself – either will work, your way is just more precise. Have fun!
I’ve been using this recipe for over 10 years now (was given to me by a former preschool teacher). But instead of using liquid food coloring, I add a packet of Kool-aid mix (for color and scent). Love it!
Great idea!! It is such a versatile recipe – thank you for sharing!
I did not have regular flour so I used coconut flour. I had to use 2 c + 1 T, but it worked perfectly. Would also be good for anyone who needs the playdough to be gluten free.
Thank you Amanda! A great tip for those who need a gluten free version!
Trying to make this gluten free and it’s not working. What were your quantities? I see you’ve put 2c and 1T but unsure what that relates too? Thanks
We made this today with gluten free all purpose flour (my two year old and I have to stay away from gluten) and it did not work at all sadly :-(. SO SO sticky with no amount of flour added to help. I am having to soak my bowl in hot soapy water to try to get it off. It took about 5 mins and 10 paper towels to get it off my hands as washing hands in sink still wouldn’t get it off! Just in case anyone is in the same boat as me with gluten, this recipe does not fare so well with Bob’s all purpose gluten free flour.
This is SO GOOD to know! But, I am sorry you were the one that had to discover it! Thank you very much for sharing with us to help others avoid this same dilemma. Another Mom has tried coconut flour as a Gluten free option and said it worked very well. Perhaps you could give that a try?
Hi! I tried this recipe and it was great at first. After we stored it in a tupperware container, it ended up getting so sticky to handle. I added more flour and that didn’t help. Thoughts?
Hi Ashley, Thanks for reaching out – sorry your playdough went sticky! That’s not good. I would suggest that you keep adding flour until it isn’t sticky anymore. You might consider adding a little more oil as well. Perhaps there was a touch too much water. I would add 1/4 cup more flour and another Tablespoon of oil at first. If it is still sticky, add again. I hope you can save it!
Made it with the grandkids and it was GREAT! Thank you for sharing. Followed the directions exactly and I had no issues at all. It is perfect play dough…..
Yay!!! Thank you Tacy!
When do we add the oil?
Anytime! Just pop it all together in any order at all. Thanks for your question
I made this with orange essential oil. It felt really nice, and it was like a spa for my hands when it was still warm! Sorry to be 3 years late, but you have a typo – you said: add more flour, TO clumpy, add more boiled water! It probably doesn’t mater at this point, but just wanted to let you know 😉
It always matters Jessica!! Thank you for finding my typo. I am glad you liked this playdough recipe!
This turned out great! Thanks for sharing! My 23 month old has been intrigued for over 30 minutes! A total win! Thanks again!
Wonderful! I love total wins! Thank you for letting me know Heather!
Hello there!
Is this no bake playdough ok to eat?
Just want to double check before playing around with my daughter
Thank you so much!
Hi Elizabeth – thank you for this question! This playdough is definitely NOT edible as it is very, very high in salt.
Love this recipe!!! Just finished making. I was wondering—- For storage once finished for the day…..I’ve put each color in a ziplock bag, but wondering if it needs to be refrigerated???? Or can it just be left out at room temp?? Hoping to be able to pull this out on another rainy day! Thanks so much!!!
Hi Kelly! Great question – it can definitely be kept in the fridge to keep it fresh for an even longer period of time, but we just leave ours at room temperature and it lasts for months!
Made this and yes it was super easy, but I’m surprised no one talks about adding food coloring and how it will dye your hands when you play with it. Am I missing something? I can’t let my daughter play with this and touch furniture or the dye will be everywhere. How do I keep that from happening? Or is there a food coloring that doesn’t stain?
Hi Kelly! Once the food colouring is mixed into the playdough it will not get on hands at all. You can try adding the food colouring to the water first and then mixing into the playdough as well. Please let me know if you have any other questions.
We did put in the food coloring and it stained our hands as we played with it.
That is very odd! I have it stain my hands sometimes as I am mixing it in, but once it is mixed and cool it doesn’t stain. I use liquid food colouring – just a few drops – the Club House Brand. What are you using?
Hello! I’m super excited to try this recipe! I was also trying to get the free letter and number playdoh mats, but only the recipe downloaded. Could you help me find the link for the mats? Thanks!
Hi Jane! The link should have been emailed to you. If it wasn’t, please email me at Sarah@howweelearn.com so I can help you.